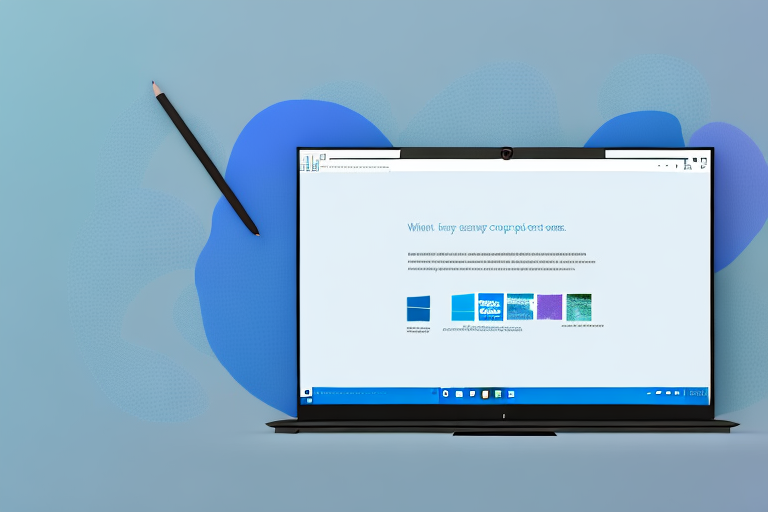
Are you tired of using the traditional Print Screen method to capture screenshots on your Windows 10 computer? Look no further – the Screen Snip Tool is here to make your life easier. In this ultimate guide, we will explore everything you need to know about this powerful tool.
Understanding the Screen Snip Tool
Before we dive into using the Screen Snip Tool, let’s first understand what it is and why you should consider using it.
The Screen Snip Tool is a built-in feature in Windows 10 that allows you to capture screenshots and quickly share them. It offers various snipping modes, making it highly versatile and convenient to use.
But let’s delve deeper into the capabilities of this powerful tool. With the Screen Snip Tool, you can capture your entire screen, a specific window, or even a selected region. This flexibility ensures that you can capture exactly what you need, without any unnecessary distractions.
Additionally, the Screen Snip Tool provides a user-friendly interface that makes the capturing process a breeze. Gone are the days of using complex keyboard shortcuts or third-party software. With just a few clicks, you can have your screenshot ready to share or save.
Furthermore, the Screen Snip Tool offers a range of annotation options, allowing you to add text, highlight important areas, or draw attention to specific details. This not only enhances your screenshot but also helps you convey your message more effectively.
What is the Screen Snip Tool?
The Screen Snip Tool is a built-in feature in Windows 10 that allows you to capture screenshots and quickly share them. It offers various snipping modes, making it highly versatile and convenient to use.
When you launch the Screen Snip Tool, you’ll be presented with four snipping options: “Rectangular Snip,” “Freeform Snip,” “Window Snip,” and “Fullscreen Snip.” Each mode serves a specific purpose, catering to different screenshot needs.
The “Rectangular Snip” mode lets you capture a rectangular portion of your screen. This is useful when you want to focus on a specific area or object within a larger context.
The “Freeform Snip” mode allows you to capture a custom-shaped region. This is particularly handy when you need to capture irregularly shaped elements or when you want to emphasize a specific part of an image.
The “Window Snip” mode enables you to capture a specific window, including its borders and title bar. This is ideal when you want to capture a particular application or program window without any clutter from the rest of your screen.
Lastly, the “Fullscreen Snip” mode captures your entire screen, providing a comprehensive view of everything displayed. This mode is perfect for capturing web pages, documents, or any content that extends beyond the visible area.
Why Use the Screen Snip Tool?
Unlike the traditional Print Screen method, the Screen Snip Tool provides a user-friendly interface and additional features that enhance your screenshot experience. Whether you need to capture your entire screen, a specific window, or a region, the Screen Snip Tool has got you covered.
One of the key advantages of using the Screen Snip Tool is its simplicity. With just a few clicks, you can capture exactly what you need, without any unnecessary steps or complicated processes. This saves you time and allows you to focus on the task at hand.
Moreover, the Screen Snip Tool offers seamless integration with other Windows 10 features. Once you’ve captured a screenshot, you can easily annotate it using the built-in Ink Workspace or share it directly through various apps and platforms.
Additionally, the Screen Snip Tool allows you to save your screenshots in different formats, including PNG, JPEG, and GIF. This flexibility ensures compatibility with a wide range of devices and applications, making it easier to use your screenshots wherever you need them.
Whether you’re a student, professional, or casual user, the Screen Snip Tool is a valuable tool for capturing and sharing information. Its intuitive interface, versatile snipping modes, and additional features make it an essential part of your Windows 10 experience.
Getting Started with the Screen Snip Tool
Now that you understand the basics, let’s explore how to access and navigate the Screen Snip Tool.
The Screen Snip Tool is a powerful feature that allows you to capture screenshots with ease. Whether you need to capture a specific area of your screen or the entire screen, this tool has got you covered.
Accessing the Screen Snip Tool
To access the Screen Snip Tool, simply press the Windows key + Shift + S on your keyboard. This keyboard shortcut opens the snipping overlay, giving you quick and convenient access to the tool.
Once you press the keyboard shortcut, you will notice that your screen dims slightly, and a small toolbar appears at the top of the screen. This toolbar is your gateway to capturing screenshots effortlessly.
Navigating the Screen Snip Interface
Once the snipping overlay is open, you can choose between four snipping modes: rectangular, freeform, window, and full-screen. Each mode has its own unique functionality, enabling you to capture screenshots with precision and ease.
The rectangular mode allows you to select a specific rectangular area on your screen to capture. This is perfect for capturing a specific region of a webpage, an image, or any other content that catches your eye.
The freeform mode gives you the freedom to capture any irregular shape on your screen. Whether it’s a unique design element or a complex graph, this mode allows you to capture it accurately.
The window mode lets you capture an entire window, including the title bar and borders. This is useful when you want to capture a specific application or program window, without any distractions from the rest of your screen.
The full-screen mode, as the name suggests, captures your entire screen. This is ideal for capturing a comprehensive view of your desktop, including multiple applications and windows.
Once you have selected your desired snipping mode, simply click and drag your cursor to capture the area you want. You can also use the arrow keys on your keyboard to fine-tune the selection.
After you release the mouse button or the arrow keys, the captured screenshot will be automatically saved to your clipboard. You can then paste it into any application or document of your choice.
With the Screen Snip Tool, you have the power to capture and share screenshots effortlessly. Whether you need to capture a funny meme, an important piece of information, or a beautiful moment, this tool is your go-to solution.
Using the Screen Snip Tool
Now that you know how to access and navigate the Screen Snip Tool, let’s dive into the different screenshot techniques you can employ.
How to Take a Basic Screenshot
If you want to capture the entire screen, simply select the full-screen snipping mode and click anywhere on the screen. The captured screenshot will be saved to your clipboard, ready to be pasted into any application or document.
If you prefer a more customized approach, you can use the rectangular or freeform snipping modes. To capture a specific region, drag your cursor and release it once the desired area is selected. The captured screenshot will automatically be copied to your clipboard, allowing you to paste it wherever you need it.
Advanced Screenshot Techniques
The Screen Snip Tool offers additional options to enhance your screenshots. For example, if you want to capture a specific window, select the window snipping mode and click on the desired window. The tool will automatically capture that window, excluding any unwanted elements from your screenshot.
If you need to annotate your screenshots, the Screen Snip Tool provides basic editing features. Once you have captured a screenshot, you can use the built-in pen, highlighter, and eraser tools to mark up the image before sharing it.
Customizing the Screen Snip Tool
Now that you are familiar with the various snipping modes, let’s explore how to customize the settings of the Screen Snip Tool.
Adjusting Settings for Optimal Use
To access the Screen Snip Tool settings, open the Settings app on your Windows 10 computer and navigate to the “Ease of Access” section. From there, you can adjust preferences such as the default snipping mode, delay timer, and whether or not to include the snip in the Action Center notifications.
Personalizing the Screen Snip Tool
Additionally, you can personalize the Snip & Sketch app by customizing the keyboard shortcuts. By assigning your preferred shortcuts to different snipping modes, you can streamline your screenshot workflow and make it even more efficient.
Troubleshooting Common Issues
As with any software tool, you may encounter occasional glitches while using the Screen Snip Tool. Here are some common issues and their solutions.
Resolving Technical Glitches
If the Screen Snip Tool is not working properly, try restarting your computer and ensuring that you have the latest updates installed. If the issue persists, you can troubleshoot further by checking for conflicting software or running the Windows 10 System File Checker tool to fix any corrupted files.
FAQs about the Screen Snip Tool
Q: Can I save my screenshots directly to a specific folder?
A: Yes, you can change the default save location for your screenshots by going to the “Save location” settings in the Snip & Sketch app.
Q: Does the Screen Snip Tool capture screenshots in real-time?
A: Yes, the tool captures screenshots instantly, allowing you to capture the exact moment you want to preserve.
Q: Can I share my screenshots directly from the Snip & Sketch app?
A: Absolutely! The Snip & Sketch app provides easy sharing options, allowing you to quickly send your screenshots via email, social media, or other applications.
With this ultimate guide, you should now be well-equipped to make the most of the Screen Snip Tool in Windows 10. Whether you are a professional needing to capture screenshots for work or a casual user wanting to share funny moments with friends, the Screen Snip Tool is a valuable tool in your arsenal. Happy snipping!
Enhance Your Screenshots with GIFCaster
Ready to take your screenshot game to the next level? With GIFCaster, not only can you capture your screen, but you can also add a touch of personality and fun by incorporating GIFs into your shots. Say goodbye to mundane images and hello to vibrant, animated conversations that capture the spirit of the moment. Whether it’s celebrating a team win or just sharing a laugh, use the GIFCaster App to make every capture an engaging and creative expression of your digital life. Get started now and turn your screenshots into memorable moments.