Taking screenshots is an essential part of modern computing. Whether you need to capture an important moment, document an error message, or save information for future reference, screenshots are incredibly useful. However, sometimes you may need to crop screenshots to focus on a specific area or remove unnecessary elements. This is where the Windows Screenshot Crop Shortcut comes in handy.
Understanding the Importance of Screenshot Crop Shortcuts
The ability to crop screenshots efficiently can save you time and effort. With the Windows Screenshot Crop Shortcut, you can quickly and easily crop your screenshots without the need for additional software or tools. This feature is especially helpful when you want to highlight specific details or remove sensitive information before sharing the screenshot with others.
When it comes to capturing and sharing information, screenshots have become an integral part of modern computing. Whether you are troubleshooting technical issues, creating presentations, providing visual feedback, or simply capturing a funny moment on your screen, screenshots play a crucial role in various tasks. They allow you to capture the exact image displayed on your monitor, helping you communicate more effectively and efficiently.
The Role of Screenshots in Modern Computing
Screenshots have revolutionized the way we capture and share information. In today’s digital age, where visual content is king, screenshots have become a powerful tool in our daily lives. They enable us to capture and preserve moments, document important information, and share our experiences with others.
When troubleshooting technical issues, screenshots provide a visual reference that can help both the user and the support team identify and resolve problems more efficiently. Instead of struggling to describe the issue in words, a screenshot can convey the exact error message or unexpected behavior, making it easier for others to understand and provide assistance.
In the world of presentations, screenshots can enhance the clarity and impact of your message. By capturing specific sections of a webpage, document, or application, you can highlight important details, emphasize key points, and provide visual evidence to support your arguments. This not only makes your presentation more engaging but also helps your audience grasp complex concepts more easily.
Furthermore, screenshots are invaluable when it comes to providing visual feedback. Whether you are reviewing a design, suggesting changes to a website layout, or reporting a bug in a software application, a screenshot can convey your observations and recommendations more effectively than written descriptions alone. By capturing the exact visual context, you can ensure that your feedback is clear, concise, and actionable.
Lastly, screenshots are not only practical but also fun. They allow us to capture and share memorable moments from our digital lives. Whether it’s a hilarious chat conversation, a stunning in-game achievement, or a beautiful piece of artwork, screenshots enable us to preserve and share these moments with others, creating lasting memories and fostering connections.
Why Use Shortcuts for Cropping Screenshots?
Shortcuts are an excellent way to streamline your workflow and boost productivity. They eliminate the need for manually navigating through menus and options, allowing you to perform tasks with a few simple keystrokes. Using a shortcut for cropping screenshots can save you valuable time and make the process more convenient.
By using a shortcut, you can quickly select the desired area to crop without having to rely on external software or editing tools. This not only speeds up the cropping process but also reduces the risk of accidentally cropping the wrong area or making mistakes while using complex editing features.
Moreover, shortcuts provide consistency and efficiency in your screenshot cropping workflow. Once you have familiarized yourself with the shortcut, you can effortlessly apply it to any screenshot, regardless of its size or content. This ensures that your cropping process remains standardized and efficient, allowing you to focus on the important aspects of your work.
Additionally, using shortcuts for cropping screenshots can improve your overall productivity. By reducing the time and effort required to crop screenshots, you can allocate more time to other tasks and projects. This increased efficiency can have a positive impact on your workflow, enabling you to accomplish more in less time.
In conclusion, understanding the importance of screenshot crop shortcuts is essential for anyone who regularly works with screenshots. By utilizing these shortcuts, you can save time, enhance your communication, and streamline your workflow. So, take advantage of the Windows Screenshot Crop Shortcut and unlock the full potential of your screenshot cropping capabilities!
The Basics of Taking Screenshots on Windows
Before diving into the details of the Screenshot Crop Shortcut, it’s important to understand the different methods for capturing screenshots on Windows. Windows offers several built-in options, each suited for different scenarios.
When it comes to capturing screenshots on Windows, you have a variety of methods at your disposal. These methods are designed to cater to different needs and preferences, ensuring that you can capture the perfect screenshot in any situation.
Different Methods for Capturing Screenshots
Windows provides various ways to capture screenshots, such as using the Print Screen key, the Snipping Tool, or the Windows Game Bar. Let’s take a closer look at each of these methods:
- The Print Screen Key: One of the most basic and widely used methods for capturing screenshots on Windows is by using the Print Screen key. With a simple press of this key, you can capture the entire screen and save it for later use. This method is great for quickly capturing what’s on your screen without any additional steps.
- The Snipping Tool: If you’re looking to capture a specific area of your screen, the Snipping Tool is the way to go. This handy tool allows you to select the exact portion of the screen you want to capture, giving you more control over the content of your screenshot. Whether it’s a small section of a webpage or a specific window, the Snipping Tool lets you capture it with precision.
- The Windows Game Bar: For all the gamers out there, the Windows Game Bar is a fantastic tool for capturing screenshots while gaming or recording gameplay. With a simple keyboard shortcut, you can instantly capture those epic gaming moments and share them with your friends. The Windows Game Bar also offers additional features like recording gameplay, making it a versatile tool for gamers.
As you can see, Windows provides a range of options for capturing screenshots, allowing you to choose the method that best suits your needs and preferences.
Locating Your Saved Screenshots
After capturing a screenshot, you may wonder where it’s saved on your computer. Understanding the default save locations can help you quickly access and utilize your screenshots. Let’s explore where Windows saves your screenshots:
- Print Screen Key: When you capture a screenshot using the Print Screen key, it is automatically saved to the clipboard. From there, you can paste it directly into image editing software or any other application that supports image pasting. This method offers a quick and convenient way to capture and use screenshots without the need for additional steps.
- Snipping Tool and Windows Game Bar: Screenshots taken with the Snipping Tool or Windows Game Bar are automatically saved to the Screenshots folder within your user profile. This ensures that all your captured screenshots are neatly organized in one location, making it easy to find and access them whenever you need.
Knowing where your screenshots are saved can save you time and effort when you need to locate and use them. Whether you want to edit, share, or simply admire your captured screenshots, having them readily available in the designated folders makes the process seamless.
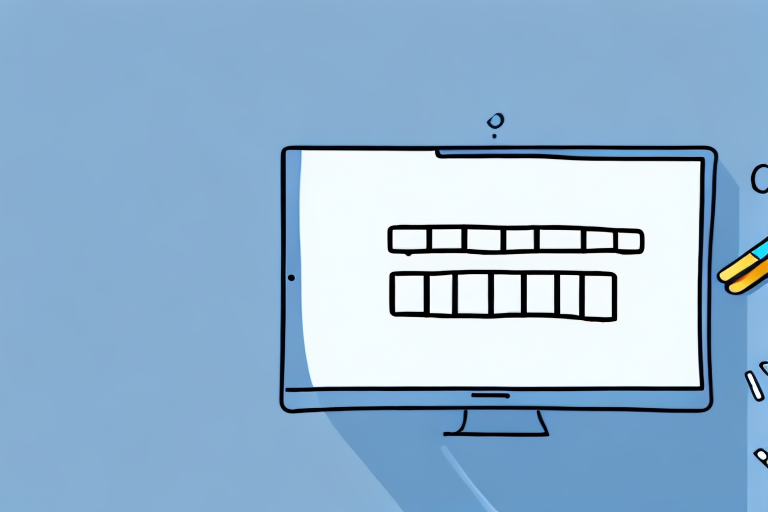
Introduction to Screenshot Crop Shortcut
The Screenshot Crop Shortcut is a convenient feature available in Windows that allows you to quickly crop your screenshots without the need for additional software or tools. This shortcut simplifies the process and provides a seamless way to edit your screenshots on the spot.
What is the Screenshot Crop Shortcut?
The Screenshot Crop Shortcut is a combination of keyboard keys that allows you to crop your screenshots directly without opening an image editing program. By using this shortcut, you can easily trim and focus on specific areas of your screenshots.
Benefits of Using the Screenshot Crop Shortcut
There are several benefits to using the Screenshot Crop Shortcut. Firstly, it saves time by eliminating the need to open an image editing program. Secondly, it provides a quick way to remove sensitive information from your screenshots before sharing them. Additionally, it allows you to enhance the clarity and aesthetics of your screenshots by focusing on specific elements.
Step-by-Step Guide to Using the Screenshot Crop Shortcut
Now that you understand the importance of the Screenshot Crop Shortcut, let’s walk through the steps to access and use this convenient feature.
Accessing the Screenshot Crop Shortcut
To access the Screenshot Crop Shortcut:
- Take a screenshot using one of the methods mentioned earlier.
- Press the Windows key + Shift + S simultaneously.
Using the Shortcut for Different Screenshot Types
You can use the Screenshot Crop Shortcut for various types of screenshots. After triggering the shortcut, a selection tool will appear, allowing you to choose the desired portion of the screenshot to crop. Once you’ve made your selection, the cropped image will be saved to the clipboard, ready to be pasted or edited as needed.
Troubleshooting Common Issues with Screenshot Crop Shortcut
While the Screenshot Crop Shortcut is generally straightforward to use, there are some common issues you may encounter. Here are a few tips to help you resolve these issues.
Resolving Shortcut Key Conflicts
If you’re experiencing conflicts with the Screenshot Crop Shortcut, it may be due to other software or applications using the same key combinations. To resolve this, you can customize the shortcut keys in the Windows settings to avoid conflicts.
Dealing with Screenshot Quality Issues
Occasionally, you may encounter quality issues when cropping screenshots. This can be due to the resolution or size of the original screenshot. If you notice a decrease in image quality, consider capturing screenshots at a higher resolution or resizing them before cropping.
By following this comprehensive guide, you can master the Windows Screenshot Crop Shortcut and enhance your screenshot productivity. Whether you’re a professional who frequently shares visual content or a casual user who enjoys capturing funny moments, this shortcut can streamline your workflow and make the screenshot editing process a breeze.
Enhance Your Screenshots with GIFCaster
Ready to take your screenshot game to the next level? With GIFCaster, not only can you capture and crop your screenshots with ease, but you can also add a touch of personality and fun by incorporating GIFs. Transform a standard work message into an engaging and creative expression that captures attention and brings a smile to everyone’s face. Don’t settle for ordinary screenshots; make them extraordinary with GIFCaster. Use the GIFCaster App today and start sharing your moments with a twist!