If you are a proud owner of the Motorola Stylus, you may be wondering how to capture screenshots on your device. Whether you want to save important information, share a funny conversation, or simply capture a stunning image, taking screenshots on the Motorola Stylus is a breeze. In this step-by-step guide, we will walk you through the entire process, from understanding the basics of the Motorola Stylus to accessing and sharing your screenshots.
Understanding the Basics of Motorola Stylus
Before delving into the process of taking a screenshot, it is important to familiarize yourself with the key features of the Motorola Stylus. This innovative device boasts an impressive set of functionalities that enhance the overall user experience.
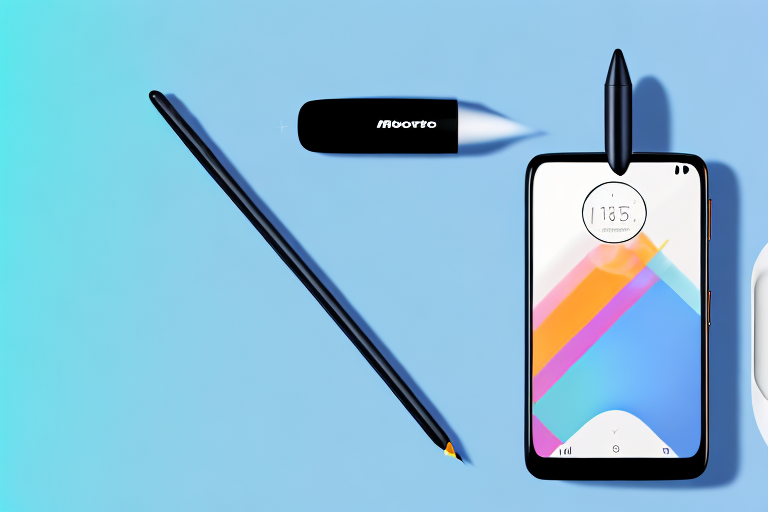
The Motorola Stylus is a cutting-edge device designed to meet the needs of modern users. With its sleek design and advanced features, it offers a seamless and intuitive experience. Whether you are a professional who needs to take notes on the go or a creative individual looking to unleash your artistic talents, the Motorola Stylus has got you covered.
Key Features of Motorola Stylus
The Motorola Stylus comes equipped with a large display, powerful processor, and an integrated stylus pen. This combination allows for precise input and effortless navigation. The large display provides a vibrant and immersive viewing experience, making it ideal for multimedia consumption and productivity tasks.
The powerful processor ensures smooth performance, enabling you to multitask seamlessly and run demanding applications without any lag. Whether you are editing photos, playing graphics-intensive games, or streaming high-definition videos, the Motorola Stylus can handle it all with ease.
One of the standout features of the Motorola Stylus is its integrated stylus pen. This pen offers a natural and precise writing experience, allowing you to jot down notes, sketch drawings, and annotate documents with ease. The stylus pen is seamlessly integrated into the device, making it easily accessible whenever you need it.
Additionally, the device offers a variety of customization options, ensuring that you can tailor it to your unique preferences. From adjusting the display settings to personalizing the home screen layout, the Motorola Stylus allows you to make it truly yours.
Navigating the Motorola Stylus Interface
Before diving into the screenshot process, it is essential to have a good understanding of the device’s user interface. Familiarize yourself with the various menus, buttons, and settings that are available. This will make the screenshot process smoother and help you troubleshoot any potential issues down the line.
The Motorola Stylus features a user-friendly interface that is designed to be intuitive and easy to navigate. The menus and settings are logically organized, allowing you to quickly find what you need. Whether you are adjusting the brightness, changing the sound profile, or accessing the camera, everything is just a few taps away.
Take some time to explore the different features and functionalities of the Motorola Stylus. Familiarize yourself with the gestures and shortcuts that can help you navigate the device more efficiently. By mastering the interface, you will be able to make the most out of your Motorola Stylus and enjoy a seamless user experience.
Preparing for the Screenshot
Now that you have gained an understanding of the basics, it is time to prepare for taking a screenshot on your Motorola Stylus. There are a few key steps to follow before initiating the capture.
Checking Screen Content
Prior to taking a screenshot, ensure that the content on your screen is exactly what you want to capture. Double-check that all the relevant information, images, or conversations are visible and arranged as desired.
For example, if you are capturing a webpage, make sure that all the text and images are fully loaded and displayed correctly. It would be a shame to capture a screenshot only to realize later that some elements were missing or not properly aligned.
If you are taking a screenshot of a conversation, ensure that the entire conversation is visible on the screen. Sometimes, long conversations can get cut off, and you might miss out on important context if you don’t scroll to the end.
Adjusting Screen Brightness and Contrast
In certain lighting conditions, adjusting the screen brightness and contrast can significantly enhance the quality of your screenshots. Experiment with different settings to find the optimal combination that provides clear and vibrant captures.
For instance, if you are in a dimly lit room, increasing the screen brightness can make the content more visible and prevent any potential blurriness. On the other hand, if you are in a brightly lit environment, reducing the brightness can help avoid overexposure and maintain the details in your screenshot.
Similarly, adjusting the contrast can help make the colors pop and improve the overall clarity of the captured image. Play around with different contrast levels to find the setting that best suits your needs.
Remember, the goal is to capture a screenshot that accurately represents what you see on your screen. By checking the screen content and adjusting the brightness and contrast, you can ensure that your screenshots are of the highest quality and effectively convey the information you want to share.
The Process of Taking a Screenshot
Now that you have prepared your Motorola Stylus for taking screenshots, let’s explore the different methods available to capture the content on your screen.
Before we dive into the details of the different methods, it’s worth mentioning that taking screenshots can be a useful tool in various situations. Whether you want to capture a funny conversation, save an important piece of information, or share a memorable moment from a video, knowing how to take a screenshot can come in handy.
Using the Button Combination Method
The most common way to take a screenshot on the Motorola Stylus is by using a simple button combination. This method is straightforward and can be done quickly with just a few taps.
To take a screenshot using the button combination method, start by locating the Power button and the Volume Down button on your device. Once you have identified these buttons, press and hold them simultaneously for a few seconds. Be sure to press and hold both buttons at the same time to ensure the screenshot is captured.
As you press and hold the Power button and the Volume Down button, you may notice a visual confirmation on your screen. This confirmation can come in the form of a flash or a brief animation, indicating that the screenshot has been successfully captured.
After capturing the screenshot, you might be wondering where it is saved. By default, the screenshot will be stored in the default storage location on your device. This location may vary depending on the device’s settings, but it is typically found in the “Screenshots” folder in your device’s gallery or photo app.
Using the Swipe Method
If you prefer a more interactive approach, the Motorola Stylus also offers a swipe method to capture screenshots. This method allows you to capture screenshots with a simple gesture, making it convenient and efficient.
To use the swipe method, start by opening the screen you wish to capture. It could be a webpage, an app, or even a video. Once you have the desired content on your screen, get ready to perform the swipe gesture.
With three fingers, swipe down from the top of the screen in a quick and smooth motion. Make sure to use three fingers simultaneously to trigger the screenshot process. This gesture will signal your device to capture the screen and save the image for future use.
Similar to the button combination method, the screenshot captured using the swipe method will be stored on your device. You can access it later in the default storage location, usually in the “Screenshots” folder.
Now that you know the two main methods for taking screenshots on the Motorola Stylus, you can choose the one that suits your preference and needs. Whether you prefer the simplicity of the button combination method or the interactive nature of the swipe method, capturing screenshots has never been easier.
Remember, screenshots can be a powerful tool for capturing and preserving information, moments, and memories. So, don’t hesitate to explore and experiment with these methods to make the most out of your Motorola Stylus.
Accessing and Sharing Your Screenshots
Now that you have successfully captured screenshots on your Motorola Stylus, it’s time to access and share them with ease.
Locating Your Screenshots in the Gallery
To view your screenshots, navigate to the Gallery app on your Motorola Stylus. Look for the “Screenshots” folder, where all your captured screenshots are stored. From here, you can organize, edit, or delete your screenshots as desired.
Sharing Screenshots via Different Platforms
Sharing your screenshots with friends, colleagues, or on social media platforms is a seamless process on the Motorola Stylus. You can utilize various sharing options, such as email, messaging apps, or direct social media integration. Simply select the screenshot you wish to share, choose the preferred sharing method, and follow the prompts to send it to the desired recipient or platform.
Troubleshooting Common Screenshot Issues
While taking screenshots on the Motorola Stylus is generally straightforward, there may be occasional challenges or issues that arise. Here are a few troubleshooting tips to help you overcome common screenshot problems.
Dealing with Unresponsive Buttons
If the buttons on your Motorola Stylus are unresponsive or not functioning as expected, consider restarting your device. Sometimes, a simple restart can resolve temporary glitches and restore normal button functionality.
Resolving Screen Capture Errors
If you encounter errors while attempting to capture a screenshot, ensure that your device has sufficient storage space. Screenshots require storage space to be saved, and limited storage can impede the capture process. Additionally, check for any pending system updates and install them to ensure optimal performance.
With these step-by-step instructions, capturing screenshots on your Motorola Stylus has never been easier. Whether you need to save important information or share an incredible moment, taking screenshots offers a quick and convenient way to capture and preserve content on your device. Embrace the power and versatility of the Motorola Stylus, and unleash your creativity with stunning screenshots.
Enhance Your Screenshots with GIFCaster
Ready to take your Motorola Stylus screenshots to the next level? With GIFCaster, you can add a touch of personality and fun to your captures. Transform a standard work message into a delightful celebration or express your creativity in a way that stands out. Make your screenshots more engaging and share moments that truly reflect your style. Use the GIFCaster App today and start turning your screenshots into animated conversations!