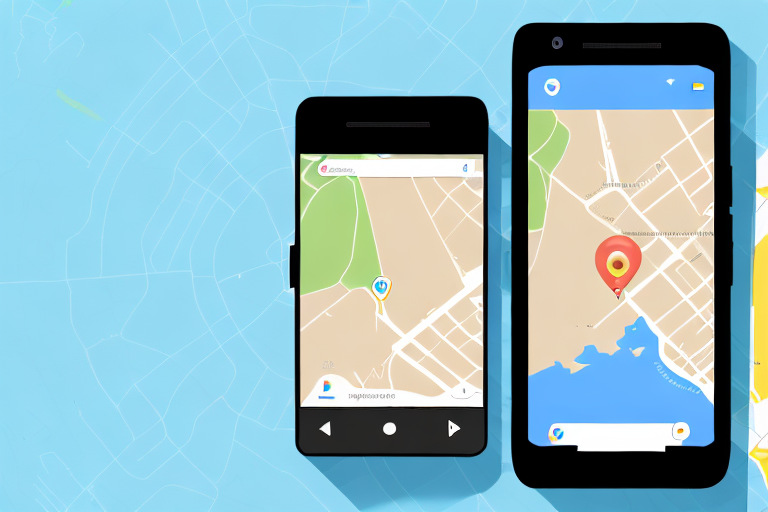
In today’s digital age, Google Maps has become an essential tool for navigating the world around us. Whether we’re exploring unfamiliar places or trying to find the quickest route to our destination, Google Maps offers a wealth of information at our fingertips. However, there are times when we may need to capture a specific view or save a particular location for future reference. That’s where screenshots come in handy!
Understanding the Importance of Screenshots in Google Maps
Before we delve into the step-by-step guide on how to take screenshots on Google Maps, let’s first explore why screenshots are valuable in this context.
Google Maps has become an integral part of our lives, helping us navigate through unfamiliar territories and discover new places. However, relying solely on our memory to recall specific map views and information can be challenging. This is where screenshots come to the rescue.
Benefits of Taking Screenshots on Google Maps
Screenshots serve as visual records, allowing you to capture and preserve specific map views and information. Whether you want to remember a picturesque location, share directions with a friend, or simply keep track of your favorite places, screenshots enable you to do so with ease.
Imagine stumbling upon a hidden gem during your travels, a breathtaking view that you want to remember forever. By taking a screenshot, you can immortalize that moment and revisit it whenever you desire. Screenshots also come in handy when you want to share your travel experiences on social media, allowing you to showcase the beauty of a place through captivating visuals.
Common Uses of Google Maps Screenshots
There are numerous practical applications for Google Maps screenshots. Let’s explore some common scenarios:
- Sharing directions or locations with others: Whether you’re meeting up with friends or guiding someone to a specific destination, screenshots provide a clear visual reference. You can easily highlight the route and points of interest, ensuring that the recipient understands the directions accurately.
- Saving information about landmarks or points of interest: When exploring a new city or planning a trip, you may come across interesting landmarks or points of interest that you want to remember. By taking a screenshot, you can capture the name, location, and other relevant details, creating a personalized travel guide for future reference.
- Providing visual reference for trip planning: Planning a vacation involves researching various attractions, accommodations, and transportation options. Screenshots can be invaluable during this process, allowing you to compare different locations, map out routes, and visualize the proximity of key landmarks to your accommodation.
- Recording visual evidence of a location for future use: In some cases, you may need to document a specific location for legal or professional purposes. By taking a screenshot, you can capture the exact map view, ensuring that you have visual evidence to support your claims or provide context when needed.
As you can see, screenshots in Google Maps offer more than just a convenient way to capture and share information. They empower you to create a visual library of your experiences, enhance your trip planning process, and provide evidence when required.
Preparing to Take a Screenshot
Before you embark on the screenshotting journey, there are a few preparatory steps you need to take to ensure a smooth experience.
Firstly, make sure you have a clear understanding of why you want to take a screenshot. Are you trying to capture a memorable moment from a video call with friends or family? Or perhaps you need to document an important conversation for work purposes? Knowing your purpose will help you approach the screenshotting process with clarity and focus.
Secondly, check your device’s compatibility. Not all devices support the same screenshot methods, so it’s crucial to verify whether your device is compatible. Most modern smartphones, tablets, and computers can capture screenshots, but it’s always advisable to double-check your device’s user manual or online resources for specific instructions. Taking the time to ensure compatibility will save you from potential frustration later on.
Once you’ve confirmed your device’s compatibility, it’s time to familiarize yourself with the various features and functions of Google Maps. Understanding the interface will make it easier to locate your desired map area and capture precise screenshots.
Start by exploring the different view options available in Google Maps. You can switch between Map view, Satellite view, and even Street View to get a comprehensive understanding of your surroundings. Experimenting with these views will help you determine which one best suits your screenshotting needs.
Additionally, take note of the zooming and panning capabilities in Google Maps. Being able to zoom in and out and move the map around will allow you to capture specific details or encompass a larger area in your screenshots. Familiarize yourself with the zooming gestures or buttons on your device to make the process more efficient.
Furthermore, Google Maps offers various overlays and layers that can enhance your screenshots. These include traffic information, public transportation routes, and even 3D buildings. Exploring these additional features will give your screenshots more context and visual appeal.
Lastly, consider the time and weather conditions when taking screenshots in Google Maps. Depending on your purpose, you may want to capture a specific time of day or showcase a particular weather condition. Keep an eye on the time and weather indicators provided by Google Maps to ensure your screenshots accurately reflect the desired atmosphere.
Step-by-Step Guide to Taking a Screenshot on Google Maps
Now that you’re well-prepared, let’s dive into the actual process of taking screenshots on Google Maps.
Locating Your Desired Map Area
Open the Google Maps app or website and navigate to the area you wish to capture in your screenshot. You can zoom in or out and pan the map to position it perfectly.
Once you have found the perfect location on Google Maps, it’s time to capture it in a screenshot. Whether you’re using an Android device, an iOS device, or a desktop computer, the process is simple and can be done in just a few steps.
Taking a Screenshot on Android Devices
If you’re using an Android device, the screenshot process may vary slightly depending on your device model and Android version. Generally, you can take a screenshot by simultaneously pressing the power button and the volume down button. You’ll hear a capture sound, and your screen will momentarily flash, indicating that the screenshot has been successfully saved.
Android devices offer a convenient way to capture screenshots, allowing you to easily capture and share your favorite locations on Google Maps with others. Whether you want to remember a beautiful vacation spot or share directions with a friend, taking a screenshot on your Android device is a quick and efficient method.
Taking a Screenshot on iOS Devices
iOS devices, such as iPhones and iPads, have a standardized screenshot method. Press the power button and the volume up button simultaneously, and you’ll see a quick flash on your screen, indicating that the screenshot has been captured and saved to your device’s gallery.
With iOS devices, capturing screenshots on Google Maps is a seamless process. Whether you’re using an iPhone or an iPad, you can easily capture the map area you desire and save it for future reference. Whether you’re planning a road trip or exploring a new city, having a screenshot of your desired map area can be incredibly useful.
Taking a Screenshot on Desktop
If you’re using Google Maps on a desktop computer, the process is equally straightforward. On Windows, press the “Print Screen” button on your keyboard, then open an image-editing software such as Paint or Photoshop and paste the captured screenshot. On Mac, use the “Command + Shift + 4” shortcut to capture a selected portion of the screen or “Command + Shift + 3” to capture the entire screen.
Desktop computers provide a reliable and efficient way to capture screenshots on Google Maps. Whether you’re using a Windows or Mac computer, the process is simple and can be done with just a few clicks or keyboard shortcuts. Once you have captured the screenshot, you can easily edit and save it for future use.
Now that you know how to take screenshots on Google Maps, you can capture and save your favorite locations, directions, or points of interest. Whether you’re planning a trip or simply want to remember a special place, screenshots can be a valuable tool. So go ahead, explore Google Maps, and start capturing the world around you!
Troubleshooting Common Issues
While capturing screenshots on Google Maps is generally a straightforward process, there are a few common issues you may encounter along the way. Let’s address them!
Screenshot Not Capturing Entire Map
If your screenshot isn’t capturing the entire map, you may need to adjust your zoom level or try capturing multiple screenshots and stitching them together using an image-editing software.
Screenshot Quality Issues
If your screenshots appear low-quality or blurry, ensure that you’re capturing the map on maximum zoom and that your device’s screen resolution is set to an optimal level.
Tips for Enhancing Your Google Maps Screenshot Experience
Now that you’re familiar with the essentials of taking screenshots on Google Maps, let’s explore a few tips to enhance your experience even further.
Using Google Maps’ Inbuilt Features
Google Maps offers several built-in features that can enhance your screenshot experience. Experiment with options such as satellite view, 3D view, or street view to capture the desired perspective.
Third-Party Apps for Better Screenshots
If you’re looking for more advanced screenshot capabilities, consider exploring third-party apps specifically designed for capturing and editing screenshots. These apps often offer additional features and functionality, allowing you to personalize your screenshots even further.
With this step-by-step guide and our tips, you’re now well-equipped to capture screenshots on Google Maps like a pro. Take advantage of this powerful tool to document your adventures, share locations with others, and create lasting memories!
Enhance Your Screenshots with GIFCaster
Ready to take your Google Maps screenshots to the next level? With GIFCaster, you can add a dash of fun and creativity to your captures. Transform a simple map screenshot into an engaging visual story by incorporating lively GIFs. Whether it’s celebrating a planned route for an upcoming adventure or sharing a location with a touch of humor, GIFCaster allows for unique self-expression. Don’t just share a location; animate your journey with GIFCaster. Start making your Google Maps screenshots unforgettable by using the GIFCaster App today!