The Moto G Play is a popular smartphone that offers a great user experience. One of the most useful features of this device is the ability to take screenshots. Whether you want to capture a funny conversation, save an important document, or simply share something interesting with friends, knowing how to take screenshots on your Moto G Play can come in handy. In this article, we will guide you through the process of taking screenshots on your Moto G Play, step by step.
Understanding the Basics of Moto G Play
Before we dive into the details of taking screenshots on your Moto G Play, let’s familiarize ourselves with the device and its key features.
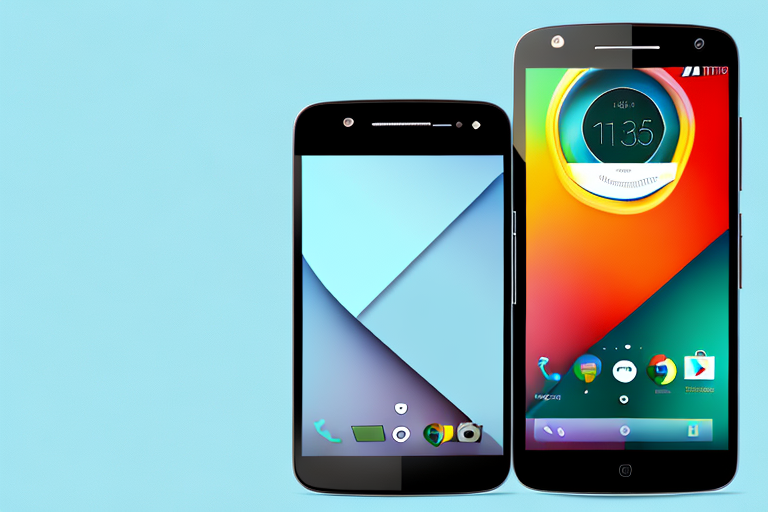
The Moto G Play is a budget-friendly smartphone that packs a punch. It offers a range of features that make it a popular choice among smartphone users. Whether you’re a tech-savvy individual or someone who simply wants a reliable device, the Moto G Play has something for everyone.
Key Features of Moto G Play
Let’s take a closer look at some of the key features that set the Moto G Play apart from other smartphones in its price range.
First and foremost, the Moto G Play boasts a vibrant display that brings your content to life. Whether you’re watching videos, browsing the web, or playing games, you’ll be treated to rich colors and sharp details.
In addition to its stunning display, the Moto G Play is equipped with a powerful processor that ensures smooth performance. Whether you’re multitasking or running demanding apps, you can expect the Moto G Play to handle it with ease.
Battery life is always a concern when it comes to smartphones, but the Moto G Play has you covered. With its long-lasting battery, you can go about your day without constantly worrying about finding a charger. Whether you’re browsing social media, streaming music, or watching videos, the Moto G Play will keep up with your needs.
Storage is another important aspect to consider when choosing a smartphone. The Moto G Play offers expandable storage options, allowing you to easily store all your photos, videos, and apps without running out of space.
These are just a few of the many features that make the Moto G Play a great choice for smartphone users. With its combination of affordability and functionality, it’s no wonder that this device has gained a loyal following.
Navigating the Moto G Play Interface
When it comes to navigating the Moto G Play interface, you’ll find it intuitive and user-friendly. The device is powered by Android, which means you’ll have access to a wide range of apps and customization options.
One of the key aspects of the Moto G Play interface is the notification panel. With a simple swipe down from the top of the screen, you can access your notifications, quick settings, and other important information. This makes it easy to stay up to date with the latest updates and messages.
Changing settings on the Moto G Play is a breeze. Whether you want to adjust the brightness, change the wallpaper, or customize your sound settings, you’ll find everything you need in the settings menu. The interface is designed to be straightforward and easy to navigate, so you can make the device truly your own.
Understanding the interface will make it easier for you to take full advantage of the Moto G Play’s screenshot capabilities. Whether you want to capture a funny meme, save an important message, or share a beautiful moment, taking screenshots on the Moto G Play is a simple and straightforward process.
Now that we’ve explored the key features and interface of the Moto G Play, let’s dive into the details of taking screenshots on this amazing device.
Preparing Your Moto G Play for Screenshots
Before you can start taking screenshots on your Moto G Play, there are a few things you need to do to ensure that everything is set up correctly.
Taking screenshots can be a useful way to capture important information, share funny moments, or save important details for later reference. Whether you want to capture a memorable conversation, save a recipe, or document an error message, knowing how to take screenshots on your Moto G Play is essential.
Checking Your Device’s Software Version
It’s important to regularly check for software updates on your Moto G Play to ensure that you have the latest features and security patches. Before taking screenshots, make sure that your device is running the latest software version.
Software updates not only bring new features but also fix bugs and improve the overall performance of your device. By keeping your Moto G Play up to date, you can ensure that you have the best possible experience when taking screenshots.
To check for software updates, go to the Settings app on your Moto G Play. Look for the “System” or “About phone” option and tap on it. From there, you should see an option to check for software updates. If an update is available, follow the on-screen instructions to download and install it.
Enabling Necessary Settings for Screenshots
To enable the screenshot function on your Moto G Play, you’ll need to make sure that the necessary settings are enabled. By default, the screenshot feature should already be enabled, but it’s always a good idea to double-check and make any necessary adjustments.
On your Moto G Play, open the Settings app and look for the “Display” or “Gestures” option. Tap on it to access the display settings. Here, you should find an option for “Screenshot” or “Three-finger screenshot.” Make sure this option is toggled on.
Once the screenshot feature is enabled, you can take screenshots by simply swiping down with three fingers on the screen. The captured screenshot will be saved in your device’s gallery, ready for you to view, edit, or share.
Additionally, you can also customize the screenshot settings on your Moto G Play. For example, you can choose to include or exclude the status bar, enable or disable sound, or even set a delay timer for capturing screenshots. These options can be found in the screenshot settings menu, allowing you to tailor the screenshot experience to your preferences.
Now that you have checked your device’s software version and enabled the necessary settings for screenshots, you are ready to start capturing and sharing moments with ease. Whether you want to capture a funny meme, save an important document, or share a beautiful landscape, taking screenshots on your Moto G Play is a simple and convenient process.
Step-by-Step Guide to Taking a Screenshot
Now that you’ve prepared your Moto G Play for screenshots, let’s dive into the step-by-step process of actually taking a screenshot on your device.
Using the Hardware Buttons for Screenshots
One of the simplest ways to take a screenshot on your Moto G Play is by using the hardware buttons. This method is quick and easy, making it a popular choice among users.
To take a screenshot using the hardware buttons, follow these steps:
- Locate the power button and the volume down button on your Moto G Play.
- Open the screen or app that you want to capture in the screenshot.
- Press and hold the power button and the volume down button simultaneously for a few seconds.
- You will see a brief animation and hear a sound to indicate that the screenshot has been taken.
- Release the buttons.
- Your screenshot will be saved in the “Screenshots” folder in your device’s gallery.
Using the hardware buttons for screenshots is a convenient method, especially when you need to capture something quickly. Whether you want to save a funny conversation, capture a memorable moment in a game, or document an important piece of information, the hardware buttons method allows you to do so with ease.
Using the Notification Panel for Screenshots
An alternative method for taking screenshots on your Moto G Play is by using the notification panel. This method gives you more control over the screenshot process and allows you to easily edit and share your screenshots.
To take a screenshot using the notification panel, follow these steps:
- Open the screen or app that you want to capture in the screenshot.
- Swipe down from the top of the screen to open the notification panel.
- Look for the “Screenshot” option in the quick settings tiles.
- Tap on the “Screenshot” option.
- You will see a brief animation and hear a sound to indicate that the screenshot has been taken.
- The screenshot will be saved in the “Screenshots” folder in your device’s gallery.
The notification panel method for taking screenshots provides additional features that can enhance your screenshot-taking experience. After capturing a screenshot, you can easily access editing tools to crop, annotate, or highlight specific areas of the screenshot. Furthermore, you can instantly share the screenshot with friends, family, or colleagues through various messaging or social media apps.
Whether you prefer using the hardware buttons or the notification panel, taking screenshots on your Moto G Play is a breeze. Experiment with both methods to find the one that suits your needs and preferences the best. With the ability to capture and share screenshots, you can easily preserve and communicate important information, memorable moments, or simply share something interesting with others.
Accessing and Managing Your Screenshots
After you’ve successfully taken a screenshot on your Moto G Play, the next step is to access and manage your screenshots. Let’s explore how you can locate, view, and organize your screenshots.
Locating Your Screenshots in the Gallery
Your Moto G Play automatically saves screenshots to a designated folder in the Gallery app. By accessing this folder, you’ll be able to view and organize your screenshots as needed.
Sharing and Editing Your Screenshots
Once you’ve located your screenshots, you might want to share them with others or make some edits before sharing. The Moto G Play offers various options for sharing and editing screenshots, allowing you to customize your screenshots as desired.
Troubleshooting Common Screenshot Issues
While taking screenshots on your Moto G Play is usually a smooth process, you may encounter some common issues along the way. Let’s look at a couple of these issues and how to troubleshoot them.
What to Do When Screenshot Function Doesn’t Work
If you find that the screenshot function on your Moto G Play is not working as expected, there are a few troubleshooting steps you can take to resolve the issue and get back to capturing screenshots.
Solving Storage Issues Related to Screenshots
Sometimes, your Moto G Play may run out of storage space due to a large number of screenshots. We’ll discuss some strategies for managing your storage space and ensuring that you can continue taking screenshots without any interruptions.
With this comprehensive guide, you now have all the information you need to take screenshots on your Moto G Play like a pro. Whether you’re a beginner or an experienced user, capturing and managing screenshots on your device is simple and convenient.
Enhance Your Screenshots with GIFCaster
Now that you’re adept at capturing screenshots on your Moto G Play, why not take your creativity to the next level with GIFCaster? GIFCaster is not just a screenshot tool; it’s a new way to express yourself by adding a touch of fun and engagement to your captures. Imagine turning a mundane work message into a delightful celebration with an animated GIF! Ready to make your screenshots come alive? Use the GIFCaster App today and start sharing your moments with a twist!