Taking a screenshot on your iPhone XS is a simple yet essential skill that can come in handy in various situations. Whether you want to capture a funny conversation, save important information, or share something interesting with your friends, knowing how to take a screenshot can be incredibly useful. In this article, we will guide you through the process step-by-step, ensuring that you become a pro at capturing screenshots on your iPhone XS.
Understanding the Basics of iPhone XS
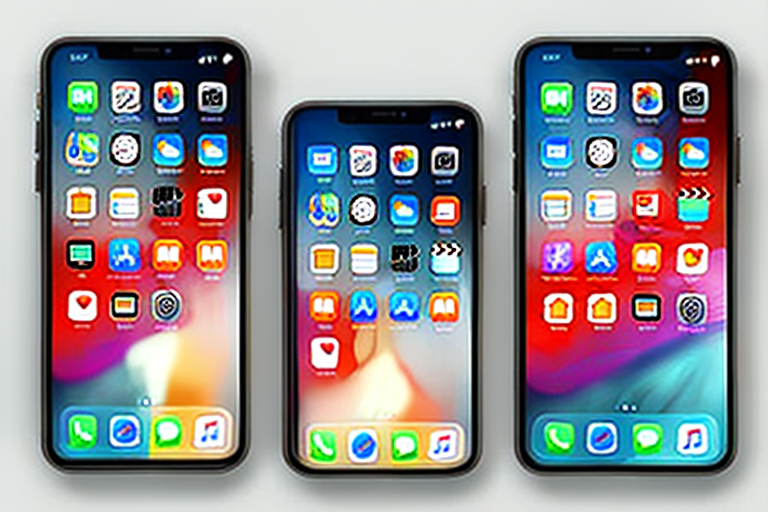
Before we dive into the specifics of taking a screenshot on your iPhone XS, let’s quickly go over some of the key features and the overall interface of the device.
Key Features of iPhone XS
The iPhone XS is packed with impressive features that make it one of the top smartphones on the market. With its powerful A12 Bionic chip, stunning Super Retina OLED display, and advanced Face ID technology, the iPhone XS offers a seamless user experience. The A12 Bionic chip is designed to deliver exceptional performance, enabling faster app launches, smoother multitasking, and more efficient power management. The Super Retina OLED display provides vibrant colors, deep blacks, and high contrast, making everything on the screen look incredibly sharp and lifelike. The advanced Face ID technology uses facial recognition to securely unlock your device and authenticate purchases, ensuring that only you can access your iPhone XS. Additionally, the iPhone XS boasts an outstanding dual-camera system, consisting of a 12-megapixel wide-angle lens and a 12-megapixel telephoto lens. This dual-camera setup allows you to capture breathtaking photos with stunning detail and depth. It also enables you to take professional-looking portrait shots with beautiful bokeh effects.
Navigating the iPhone XS Interface
Before you start taking screenshots, it’s essential to familiarize yourself with the iPhone XS interface. The device primarily uses gestures for navigation. To access the home screen, simply swipe up from the bottom of the display. This intuitive gesture replaces the traditional home button found on previous iPhone models. Swiping down from the top-right corner of the screen will bring up the Control Center, where you can quickly access essential settings and features such as Wi-Fi, Bluetooth, and screen brightness. On the other hand, swiping down from the top-left corner of the screen will reveal your notifications, allowing you to stay updated with incoming messages, emails, and other alerts. These gestures make navigating the iPhone XS interface feel fluid and natural, enhancing the overall user experience.
Furthermore, the iPhone XS introduces the use of Face ID for authentication and unlocking the device. This innovative technology uses the TrueDepth camera system, located at the top of the display, to capture and analyze your facial features. It then compares this information with the stored facial data to determine if it’s a match. Face ID is incredibly secure and reliable, working even in low-light conditions and adapting to changes in your appearance, such as wearing glasses or growing a beard. With Face ID, you can unlock your iPhone XS with just a glance, eliminating the need for passcodes or fingerprint scanning.
In addition to gestures and Face ID, the iPhone XS also features a variety of other intuitive and convenient navigation options. For example, you can use the App Switcher by swiping up from the bottom of the screen and pausing for a moment. This allows you to quickly switch between recently used apps without having to go back to the home screen. You can also use the Reachability feature by double-tapping (not pressing) the home bar at the bottom of the screen. This brings the top half of the display closer to your thumb, making it easier to reach icons and buttons with one hand.
Overall, the iPhone XS offers a user-friendly interface that combines intuitive gestures, advanced facial recognition, and convenient navigation options. Understanding these basic features and gestures will make your iPhone XS experience much smoother and more enjoyable.
Preparing Your iPhone XS for Screenshots
Before you start capturing screenshots, it’s important to ensure that your iPhone XS is set up correctly. Let’s go through a couple of essential steps to prepare your device.
Checking Your Settings
Before you take a screenshot, make sure that your device’s settings are configured appropriately. Open the Settings app and navigate to the “Screen Time” section. Ensure that the “Allow Taking Screenshots” option is enabled. This will allow you to capture screenshots on your iPhone XS.
In addition to enabling the “Allow Taking Screenshots” option, you can also customize the screenshot behavior on your device. For example, you can choose to include or exclude the screenshot preview thumbnail, enable or disable the screenshot sound, and even set a timer delay for capturing screenshots. These settings can be found within the “Screen Time” section, allowing you to personalize your screenshot experience.
Ensuring Sufficient Storage Space
Screenshots can quickly fill up your device’s storage, so it’s wise to ensure that you have sufficient space available. You can check your storage status by going to Settings > General > iPhone Storage. If your storage is running low, consider deleting unnecessary files or transferring them to iCloud to free up space for your screenshots.
In addition to managing your storage space, you can optimize your device’s storage by enabling the “Offload Unused Apps” feature. This feature automatically removes infrequently used apps from your device while keeping their data intact. When you need to use the app again, it will be reinstalled automatically. This can help free up valuable storage space for your screenshots without permanently deleting any apps.
Furthermore, you can also take advantage of iCloud Photo Library to store your screenshots in the cloud. By enabling this feature, your screenshots will be automatically uploaded to iCloud, freeing up local storage on your iPhone XS. You can access your screenshots from any device linked to your iCloud account, ensuring that your precious memories are securely backed up and easily accessible.
Step-by-Step Guide to Taking a Screenshot
Now that you’re familiar with the basics and have prepared your iPhone XS, let’s dive into the actual process of taking a screenshot. There are two methods you can use:
Using the Button Method
The button method is the traditional way of capturing screenshots on an iPhone XS. Simply locate the Volume Up button and the Side button (previously known as the Sleep/Wake button) on your device. With the content you want to capture on your screen, press both buttons simultaneously. You will see a brief flash and hear a camera shutter sound, indicating that the screenshot has been captured.
Using the Assistive Touch Method
If you prefer a more convenient method, you can enable Assistive Touch on your iPhone XS. Assistive Touch allows you to create a virtual button that can perform various actions, including taking a screenshot. To enable Assistive Touch, go to Settings > Accessibility > Touch > AssistiveTouch and toggle the switch to turn it on. Once enabled, you can customize the Assistive Touch menu to include the Screenshot option. When you are ready to capture a screenshot, tap the Assistive Touch button and select the Screenshot option from the menu.
Editing Your Screenshot
Once you have successfully captured a screenshot, you may want to edit it before sharing or saving it. The iPhone XS offers a built-in editing tool called the Instant Markup tool, allowing you to annotate, highlight, and crop your screenshots.
Using the Instant Markup Tool
To access the Instant Markup tool, simply locate the thumbnail of the screenshot that appears in the bottom-left corner of your screen immediately after capturing it. Tap on the thumbnail, and it will open in the Markup editor. Here, you can use various tools to draw, add text, or highlight specific areas of your screenshot. Once you are satisfied with the edits, tap the “Done” button to save your changes.
Cropping and Resizing Your Screenshot
If you would like to crop or resize your screenshot, you can easily do so using the built-in Photos app. Open the Photos app, navigate to the “Screenshots” album, and select the screenshot you wish to edit. Tap the “Edit” button, and choose the Crop tool. From here, you can adjust the size and position of the screenshot to fit your preferences. Once you are done, tap “Done” to save the changes.
Sharing and Saving Your Screenshot
After taking and editing your screenshot, you can share it with others or save it to your photo library for later use. Here are two common methods for sharing and saving your screenshots:
Sending Screenshots via Message or Email
If you want to share your screenshot directly with someone, you can send it via a message or email. Simply open the Photos app, navigate to the “Screenshots” album, and select the screenshot you wish to share. Tap the Share button, choose your preferred sharing option (such as Messages or Mail), and select the recipient. You can also add a message or additional attachments before sending it off.
Saving Screenshots to Your Photo Library
If you want to keep your screenshots stored for future reference, you can save them to your photo library. Open the Photos app, locate the screenshot in the “Screenshots” album, and simply tap the Share button. From the share menu, choose the “Save Image” option to save the screenshot to your photo library. You can then organize your screenshots into albums or access them easily when needed.
Now that you are familiar with the process of capturing, editing, and sharing your iPhone XS screenshots, you can confidently use this feature to capture and preserve important moments, information, or simply share interesting content with others. Enjoy exploring the possibilities and get ready to become a screenshot pro with your iPhone XS!
Enhance Your Screenshots with GIFCaster
Ready to take your iPhone XS screenshots to the next level? With GIFCaster, you can add a touch of personality and fun to your captures. Transform your standard screenshots into engaging, GIF-enhanced visuals that stand out. Whether it’s a celebratory moment in a work chat or a creative twist on your daily screen captures, GIFCaster is your go-to tool for creative self-expression. Don’t just save your moments; animate them with the GIFCaster App and share the joy!