In today’s digital age, capturing screenshots has become an essential part of our daily lives. Whether you want to save a memorable conversation, capture a funny meme, or document important information, being able to take a screenshot on your iPhone 10 is a skill every user should have. In this article, we will guide you through the process of capturing screenshots on your iPhone 10, as well as provide tips on editing and sharing them.
Understanding the Basics of iPhone 10
Before we delve into the intricacies of taking a screenshot on your iPhone 10, let’s first familiarize ourselves with this incredible device. The iPhone 10, released by Apple in 2017, introduced a slew of new features and technologies that set it apart from its predecessors. With its edge-to-edge display, Face ID recognition system, and powerful A11 Bionic chip, the iPhone 10 remains a coveted device for tech enthusiasts and casual users alike.
The iPhone 10 revolutionized the smartphone industry with its stunning design and advanced capabilities. Its edge-to-edge display provides users with an immersive visual experience, allowing them to fully immerse themselves in their favorite apps, games, and media. The Face ID recognition system, powered by advanced facial recognition technology, ensures that only the owner of the device can unlock it, providing an unprecedented level of security.
Furthermore, the iPhone 10’s A11 Bionic chip delivers exceptional performance and efficiency, allowing users to seamlessly multitask, run demanding applications, and enjoy smooth graphics-intensive games. This powerful chip, coupled with the device’s generous storage capacity, ensures that users can store all their important files, photos, and videos without worrying about running out of space.
Key Features of iPhone 10
Understanding the key features of the iPhone 10 will help you navigate its interface and take screenshots more effectively. Some notable features include the Face ID authentication system, which allows you to unlock your device and authorize payments with just a glance. This innovative technology analyzes over 30,000 invisible dots on your face to create a detailed depth map, ensuring that only you can access your device.
In addition to the Face ID system, the iPhone 10 boasts an impressive dual-camera system, enabling you to capture stunning photos and videos with ease. The 12-megapixel wide-angle and telephoto lenses work in harmony to deliver exceptional image quality, whether you’re taking a portrait, capturing a breathtaking landscape, or shooting in low-light conditions. With features such as optical image stabilization and 10x digital zoom, the iPhone 10 empowers users to unleash their creativity and capture moments like never before.
Another noteworthy feature of the iPhone 10 is its TrueDepth camera system, which powers the Face ID technology and enables the creation of stunning augmented reality experiences. This front-facing camera system analyzes more than 50 facial muscle movements to accurately capture and animate your expressions, making video calls and selfies more immersive and engaging.
Importance of Screenshots
Screenshots serve a multitude of purposes in our day-to-day lives. Whether you need to share important information with a colleague, keep records of a conversation, or save visual inspiration, screenshots are a versatile tool that can greatly enhance your productivity. Knowing how to take a screenshot on your iPhone 10 will undoubtedly streamline your digital experience.
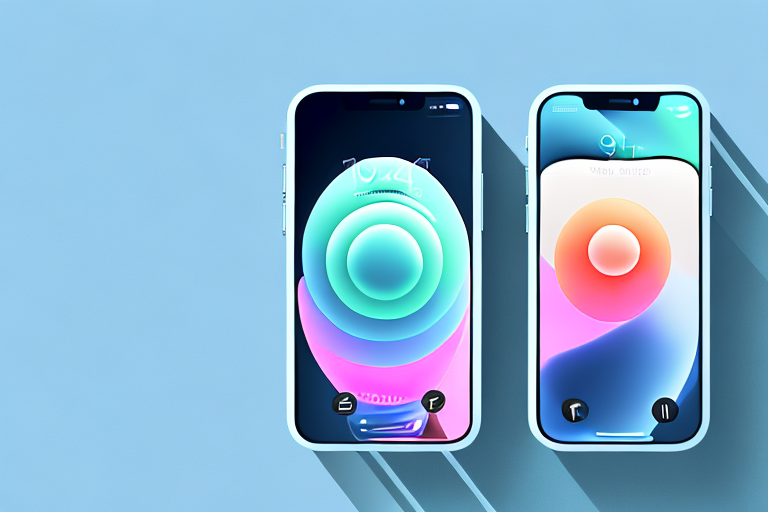
With the iPhone 10’s intuitive screenshot feature, capturing and sharing information has never been easier. Simply press the side button and volume up button simultaneously, and the device will capture a screenshot of whatever is currently displayed on the screen. The screenshot will then be saved to your Photos app, allowing you to easily access and share it with others.
Moreover, the iPhone 10 offers additional functionality for screenshots, such as the ability to annotate and mark up captured images. This feature is particularly useful for highlighting important details, adding text or arrows to provide context, or simply expressing your creativity. With the iPhone 10, screenshots become more than just static images – they become dynamic tools for communication and expression.
Preparing Your iPhone 10 for Screenshots
Before you start capturing screenshots, it’s essential to ensure that your iPhone 10 is properly set up. Taking a few moments to check your settings and ensure sufficient storage will save you time and frustration in the long run.
Checking Your Settings
Firstly, navigate to the Settings app on your iPhone 10. Select “General,” followed by “Accessibility.” Here, you will find the option to enable AssistiveTouch, which will allow you to take screenshots without using the physical buttons on your device. Enabling this feature can be particularly helpful if you have difficulty pressing the buttons simultaneously.
Once you have enabled AssistiveTouch, you can customize its behavior by going to the “Customize Top Level Menu” option. This allows you to add or remove specific functions from the AssistiveTouch menu, making it even more convenient for taking screenshots. You can assign the screenshot function to a single tap or a long press, depending on your preference.
Furthermore, if you want to enhance your screenshot experience, you can explore additional settings in the Accessibility menu. For example, you can enable “Guided Access” to lock your iPhone into a single app while taking screenshots, ensuring that accidental swipes or taps won’t interrupt the process. This feature is particularly useful when capturing screenshots of apps or games that require specific interactions.
Ensuring Sufficient Storage
Next, it’s crucial to check if you have enough available storage on your iPhone 10. Screenshot files can quickly accumulate and consume valuable space on your device. To manage your storage, go to the Settings app, select “General,” followed by “iPhone Storage.” Here, you can review your storage usage and delete unnecessary files or apps to free up space for your screenshots.
In addition to deleting files, you can also optimize your iPhone’s storage by enabling the “Offload Unused Apps” feature. This option automatically removes apps that you rarely use but keeps their documents and data intact. When you reinstall the app, it will retrieve the data, ensuring a seamless experience while freeing up storage space.
Another useful feature to consider is iCloud storage. By subscribing to an iCloud storage plan, you can easily back up your screenshots and other important files, ensuring that you never lose them even if you run out of storage on your device. iCloud storage plans offer various storage sizes, allowing you to choose the one that best suits your needs.
Lastly, it’s worth mentioning that regularly transferring your screenshots to a computer or an external storage device can also help manage your iPhone’s storage effectively. By offloading the screenshots to another device, you can keep your iPhone’s storage free for other important files and apps.
Step-by-Step Guide to Taking a Screenshot
Now that your iPhone 10 is ready for action, let’s dive into the step-by-step process of capturing a screenshot. There are two primary methods you can use, depending on your preference and device settings.
Using the Side Button and Volume Up
One of the simplest and most commonly used methods of taking screenshots on the iPhone 10 is by simultaneously pressing the Side (or Power) button and the Volume Up button. Locate these buttons on your device, and when you are ready to capture the screen, swiftly press and release them together.
Using AssistiveTouch
If you have enabled AssistiveTouch, you can use this nifty accessibility feature to take screenshots without physically pressing the device buttons. To access AssistiveTouch, tap on the floating AssistiveTouch button, select “Device,” and then “More.” Finally, tap on “Screenshot” to capture your screen effortlessly.
Editing Your Screenshots
Once you have successfully captured a screenshot on your iPhone 10, you may find yourself wanting to make some adjustments or enhancements. Fortunately, Apple provides a range of editing tools that allow you to crop, annotate, and draw on your screenshots with ease.
Accessing Your Screenshots
To access your screenshots, open the Photos app on your iPhone 10. Navigate to the “Screenshots” album, where you will find all your saved captures conveniently grouped together. From here, you can select the desired screenshot to edit or share.
Using the Edit Tools
Once you have chosen a screenshot to edit, tap on the “Edit” button in the top-right corner of the screen. This will reveal a plethora of editing tools at your disposal. Whether you want to crop the image, add text, draw, or apply filters, Apple’s editing tools provide a user-friendly interface that caters to all your creative needs.
Sharing Your Screenshots
Now that your screenshot is finely edited and customized, it’s time to share it with the world. The iPhone 10 offers various methods to seamlessly share your screenshots with friends, colleagues, or social media platforms.
Via Message or Mail
If you want to share a screenshot via a messaging app or email, simply open the screenshot in the Photos app, tap on the share icon, and select the desired app from the available options. This will open a new message or email with the screenshot conveniently attached for easy sharing.
Via Social Media
If you prefer to showcase your screenshot on social media platforms, such as Facebook, Instagram, or Twitter, the process is equally straightforward. Open the screenshot in the Photos app, tap on the share icon, and select the desired social media app. From there, you can customize your post and share your screenshot with your followers or friends.
By following these simple guidelines, you can confidently take, edit, and share screenshots on your iPhone 10. Documenting important moments, preserving valuable information, and sharing memorable content has never been easier. Whether you use screenshots for work or personal purposes, mastering this skill will undoubtedly enhance your digital experience and productivity.
Enhance Your Screenshots with GIFCaster
Ready to take your iPhone 10 screenshots to the next level? With GIFCaster, you can add a touch of fun and creativity to your captures. Transform a simple work message into a delightful celebration by incorporating animated GIFs directly into your screenshots. GIFCaster is the perfect tool for those looking to make their digital communication more engaging and expressive. Don’t just share a screenshot; make it stand out with GIFCaster. Start using the GIFCaster App today and give your screenshots the life they deserve!