In this article, we will guide you through the process of making a screenshot on an iPhone 11. Whether you want to capture a memorable moment from a video, save important information, or share something interesting with friends, taking a screenshot is a useful feature that comes in handy on various occasions. Let’s dive in and explore the different steps involved in capturing and managing your screenshots on an iPhone 11.
Understanding the Basics of iPhone 11
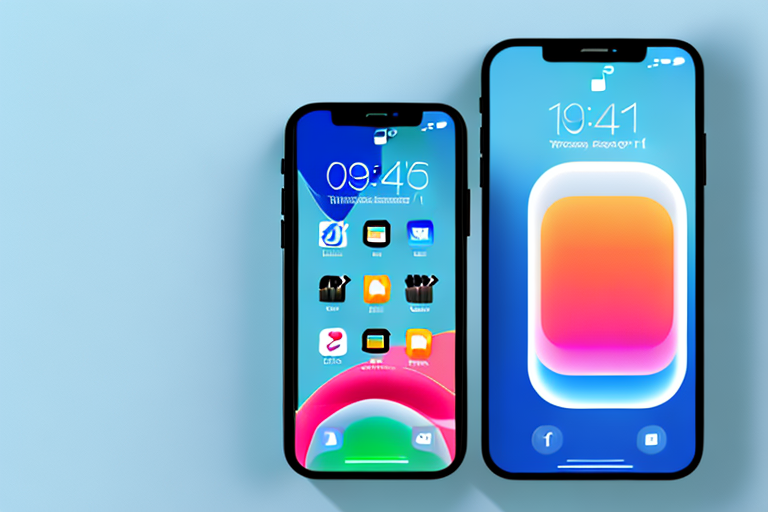
Before we get into the details of capturing screenshots, let’s briefly discuss the key features of the iPhone 11. This will help you become more familiar with the device and its capabilities. The iPhone 11 is a powerful smartphone that offers a range of advanced features, including a high-quality camera, a vibrant display, and an intuitive user interface.
The iPhone 11’s camera system is truly remarkable. With its dual-camera setup, you can capture stunning photos and videos with ease. Whether you’re a professional photographer or just someone who loves taking snapshots, the iPhone 11’s camera will exceed your expectations. It offers a wide range of shooting modes and advanced features, such as Night mode and Portrait mode, that allow you to capture breathtaking images in any lighting condition.
In addition to its impressive camera, the iPhone 11 also features a Super Retina XDR display. This display offers crisp and vibrant visuals, making everything on your screen look incredibly lifelike. Whether you’re watching movies, playing games, or browsing the web, the iPhone 11’s display will provide you with an immersive and enjoyable experience.
Another standout feature of the iPhone 11 is its Face ID technology. This advanced facial recognition system ensures secure and convenient authentication. With Face ID, you can unlock your iPhone, authorize app purchases, and even make secure payments with just a glance. It’s a feature that not only enhances the security of your device but also simplifies your everyday tasks.
Now that we’ve covered the key features of the iPhone 11, let’s take a closer look at its user interface. The iPhone 11 has a home button-less design, which means that it relies on intuitive gestures for navigation. This design choice allows for a larger display and a more immersive user experience. To navigate the iPhone 11, you simply need to swipe up from the bottom of the screen to go to the home screen. This gesture replaces the traditional home button and gives you quick access to all your apps and features.
In addition to the swipe-up gesture, the iPhone 11 also allows you to switch between recent apps with a simple swipe from the left edge of the screen. This multitasking gesture makes it easy to jump between different apps and enhances your productivity. By familiarizing yourself with these basic gestures, you’ll be able to navigate the iPhone 11 with ease and efficiency.
Preparing Your iPhone 11 for Screenshots
Before diving into the screenshot process, it’s essential to ensure that your iPhone 11 is set up correctly. This involves checking your settings and ensuring you have sufficient storage space to save your screenshots.
Checking Your Settings
Firstly, check your settings to ensure that the screenshot functionality is enabled. To do this, navigate to the “Settings” app on your iPhone 11 and select “General.”
In the “General” settings, you will find various options to customize your device. Scroll down until you find the “Accessibility” option and tap on it. Accessibility features are designed to make your iPhone more user-friendly and accessible for individuals with different needs.
Once you are in the “Accessibility” settings, continue scrolling until you find the “AssistiveTouch” option. AssistiveTouch is a powerful tool that provides a virtual button overlay on your screen, allowing you to perform various functions without using physical buttons. Make sure the toggle switch next to “AssistiveTouch” is turned on.
This feature will come in handy when using the AssistiveTouch method to take a screenshot, as we will discuss later.
Ensuring Sufficient Storage Space
Having enough storage space is crucial when it comes to saving your screenshots. To ensure you don’t run out of space, navigate to the “Settings” app, tap on “General,” and select “iPhone Storage.”
Here, you will find a detailed breakdown of your iPhone’s storage usage, including how much space is available and what is taking up the most storage. It’s always a good idea to regularly check this section to keep your device running smoothly.
Within the “iPhone Storage” settings, you have the option to offload unused apps, which will remove the app from your device but keep its data intact. This can be useful if you have apps that you rarely use but want to keep their data for future use.
You can also review and delete unnecessary files, such as old photos, videos, or documents, to free up space. The “Recommendations” section will provide suggestions on how to optimize your storage based on your usage patterns.
By managing your storage effectively, you can ensure that you have enough space to save all the screenshots you take on your iPhone 11.
The Process of Taking a Screenshot
Have you ever wanted to capture a moment on your iPhone 11 and save it as an image? Well, luckily for you, there are a couple of simple methods to take a screenshot on your device. In this article, we will explore two different methods: the button method and the AssistiveTouch method.
Using the Button Method
The button method is one of the most straightforward ways to take a screenshot on an iPhone 11. All you need to do is follow these simple steps:
- Open the app or screen that you want to capture. It could be a funny conversation, an important document, or even a high score in your favorite game.
- Press the side button, which is located on the right side of the iPhone, and the volume up button, which is located on the left side of the iPhone, simultaneously. Make sure to press both buttons at the same time.
- Release the buttons quickly after pressing them. You don’t want to accidentally trigger any other actions.
- After releasing the buttons, you will see a preview of the screenshot in the bottom left corner of the screen. This preview allows you to quickly access editing tools or swipe it away to save it directly to your Photos library.
By following these steps, you can easily capture and save any moment you want with just a few button presses.
Using the AssistiveTouch Method
While the button method is simple and effective, it may not be the most intuitive for everyone. If you find it difficult to access the physical buttons on your iPhone 11 or prefer a different approach, you can use the AssistiveTouch feature to take a screenshot. Here’s how:
- Open the app or screen that you want to capture. It could be a beautiful landscape, an inspiring quote, or even a recipe you want to try later.
- Ensure that AssistiveTouch is enabled on your device. You can do this by going to “Settings,” then “Accessibility,” followed by “Touch,” and finally “AssistiveTouch.”
- Once AssistiveTouch is enabled, a gray and white floating button will appear on your screen. Tap on this button to access the AssistiveTouch menu.
- In the AssistiveTouch menu, select “Device.” This option allows you to perform various actions related to your device.
- After selecting “Device,” tap on “More” and then choose “Screenshot.” This will trigger the screenshot capture process.
- Voila! Your screenshot will be captured and saved, just like with the button method. You can access it in your Photos library or use the editing tools available to enhance or annotate the image.
With the AssistiveTouch method, you can take screenshots with ease, even if accessing the physical buttons is not your preferred method or poses a challenge for you.
So, whether you prefer the simplicity of the button method or the accessibility of the AssistiveTouch method, capturing screenshots on your iPhone 11 is a breeze. Start preserving your favorite moments and important information today!
Editing Your Screenshot
Once you have captured a screenshot, you may want to make some adjustments or enhancements before sharing or saving it. The iPhone 11 provides built-in editing tools to help you refine your screenshots.
Accessing the Edit Tools
To access the edit tools for your screenshots, simply tap on the screenshot preview that appears in the bottom left corner of the screen immediately after taking it. This will open the editing interface, allowing you to make various changes to your screenshot.
Basic Editing Techniques
The editing tools for screenshots on the iPhone 11 include options such as cropping, rotating, adding text, drawing, and more. You can use these tools to highlight specific areas, add annotations, or make any necessary adjustments to ensure that your screenshot looks exactly the way you want it to.
Sharing and Saving Your Screenshot
Sending Screenshots via Messages or Mail
Once you have edited your screenshot to your satisfaction, you can easily share it with others. To do this, tap on the “Done” button in the top left corner of the screen. This will take you to the sharing options. From here, you can choose to send the screenshot via Messages or Mail. Simply select the desired option, add the recipient’s details, and hit send. Sharing your screenshots has never been easier!
Saving Screenshots to Your Photo Library
If you prefer to keep your screenshots for later use or reference, you can save them directly to your Photos library. After editing your screenshot, tap on the “Done” button and then select “Save to Photos.” Your screenshot will be stored within the Photos app, making it easily accessible whenever you need it.
With the knowledge and understanding of how to make a screenshot on an iPhone 11, you can now capture and manage important moments on your device effortlessly. Whether you want to capture funny conversations, save important messages, or keep a record of something interesting, the screenshot feature will undoubtedly become an essential part of your iPhone 11 experience. Happy screenshotting!
Enhance Your Screenshots with GIFCaster
Now that you’ve mastered the art of taking screenshots on your iPhone 11, why not take them to the next level with GIFCaster? Add a touch of personality and fun to your captures by incorporating animated GIFs. Whether you’re looking to celebrate a milestone with a festive animation or simply want to express your creativity, GIFCaster is the perfect tool to make your screenshots more engaging. Ready to animate your moments? Use the GIFCaster App today and transform your standard screenshots into captivating stories.