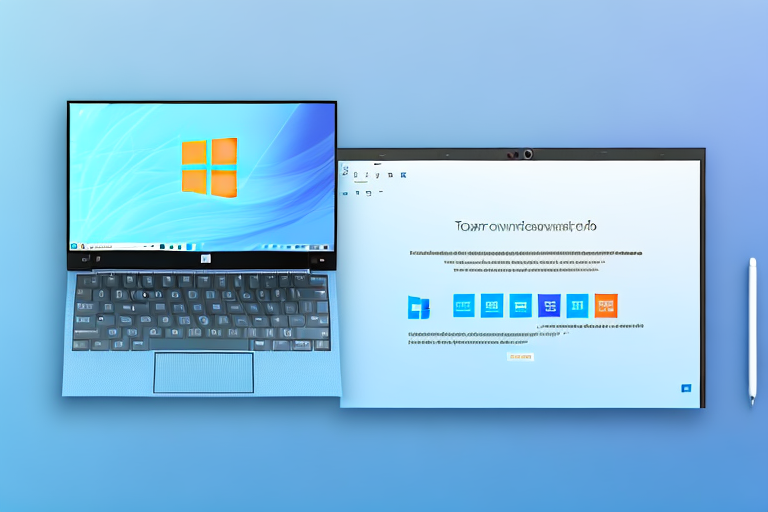
In today’s digital age, screenshots have become an essential tool for communication and information sharing. Whether for work or personal use, knowing how to capture and save screenshots on your laptop with Windows 10 can greatly enhance your productivity and simplify your digital tasks. In this article, we will explore the importance of screenshots, how to prepare your laptop, different methods for capturing screenshots on Windows 10, saving and editing your screenshots, as well as troubleshooting common screenshot issues.
Understanding the Importance of Screenshots
Screenshots play a pivotal role in digital communication. They allow us to capture and share visual representations of content, such as images, texts, and even videos, without the need for lengthy explanations. Instead of trying to verbally describe what is displayed on your screen, a simple screenshot can convey your message more effectively and save precious time. Screenshots are invaluable in various scenarios, including software demonstrations, error reporting, online tutorials, and even personal communication.
The Role of Screenshots in Digital Communication
In today’s fast-paced world, effective communication is key to success. Screenshots play a crucial role in conveying information quickly and accurately. Whether you’re collaborating with colleagues, seeking technical support, or sharing your achievements with friends, screenshots can bridge the gap between words and visuals, providing clarity and context to your messages.
When collaborating with colleagues, screenshots can be used to highlight specific details or issues that need attention. For example, if you’re working on a design project, a screenshot can capture a particular element that requires feedback or modification. By visually presenting the issue, you can ensure that everyone is on the same page and avoid any miscommunication.
When seeking technical support, screenshots can be a lifesaver. Instead of struggling to explain the problem you’re facing, a screenshot can provide the support team with a clear visual representation of the issue. This allows them to quickly identify the problem and provide you with the necessary assistance, saving both time and frustration.
Sharing achievements with friends or colleagues can be more impactful with the use of screenshots. Whether it’s a high score in a game, a completed project, or a milestone reached, a screenshot can capture the moment and make it more tangible. It adds a visual element to your accomplishment, making it easier for others to appreciate and celebrate with you.
Benefits of Using Screenshots
There are several benefits to utilizing screenshots in your digital tasks. Firstly, screenshots provide a visual record that can be easily referenced later. Instead of relying solely on memory or written notes, a screenshot allows you to capture the exact visual representation of a moment or information. This can be particularly useful when conducting research, organizing data, or recalling specific details.
Screenshots also allow you to capture and share fleeting moments that cannot be easily replicated. Whether it’s a funny social media post, a time-limited offer, or a temporary event, a screenshot ensures that you have a permanent record of the moment. This can be especially valuable in situations where the content may no longer be available or accessible in the future.
Furthermore, screenshots can be used to illustrate step-by-step instructions, making them invaluable in tutorials and guides. Instead of relying solely on written descriptions, a screenshot can visually demonstrate each step, making it easier for users to follow along. This is particularly beneficial for complex processes or tasks that require precise actions to be taken.
Overall, screenshots enhance communication, facilitate troubleshooting, and simplify complex concepts. They provide a visual element that adds clarity and context to digital communication, making it more efficient and effective. By incorporating screenshots into your digital tasks, you can streamline your communication, save time, and ensure that your messages are understood accurately.
Preparing Your Laptop for Screenshots
Before diving into capturing screenshots, it is crucial to ensure that your laptop is properly prepared. This involves checking your Windows 10 version and ensuring that you have the necessary tools for screenshot capture.
When it comes to capturing screenshots on your laptop, having the right setup is essential. Not only does it ensure that you can take high-quality screenshots, but it also saves you time and frustration. So, let’s take a closer look at how you can prepare your laptop for this task.
Checking Your Windows 10 Version
Windows 10 offers various screenshot features, but the availability of these features may differ depending on your Windows 10 version. To check your version, click on the Start Menu, select “Settings,” then “System,” and finally, “About.” Here, you will find the information about your Windows 10 version. It is essential to have an up-to-date version to access all the screenshot functionalities.
Having the latest version of Windows 10 ensures that you have access to the latest features and improvements, including those related to screenshot capture. It also ensures compatibility with other software and tools that you may use in conjunction with capturing screenshots.
Necessary Tools for Taking Screenshots
Windows 10 provides built-in tools for capturing screenshots. The primary tools are the Print Screen key, the Snipping Tool, and the Snip & Sketch Tool. Familiarizing yourself with these tools is essential as they offer distinct features to suit different screenshot needs.
The Print Screen key, often labeled as “PrtScn” or “Print Scr,” is a simple and straightforward way to capture the entire screen. When pressed, it captures a screenshot of the entire desktop and saves it to the clipboard. You can then paste it into an image editing software or document to save or modify it further.
The Snipping Tool is another handy tool that allows you to capture specific parts of the screen. With this tool, you can select a rectangular, free-form, or full-screen snip. It also provides basic editing options, such as highlighting, cropping, and adding annotations, making it a versatile tool for capturing and editing screenshots.
If you prefer a more streamlined and modern approach, the Snip & Sketch Tool is worth exploring. This tool, introduced in Windows 10 version 1809, combines the functionality of the Snipping Tool with additional features. It allows you to capture screenshots, annotate them, and even share them directly from the app. With its intuitive interface and convenient options, it’s a great tool for quick and efficient screenshot capture.
By familiarizing yourself with these tools, you can choose the one that best suits your needs and preferences. Whether you need to capture the entire screen, a specific area, or want to annotate and share your screenshots, Windows 10 has you covered.
So, before you start capturing screenshots on your laptop, take the time to check your Windows 10 version and explore the available tools. With the right setup and knowledge, you’ll be ready to capture and share screenshots effortlessly.
Different Methods of Taking Screenshots on Windows 10
Windows 10 offers various methods to capture screenshots. Depending on your preferences and requirements, you can choose between the Print Screen key, the Snipping Tool, and the Snip & Sketch Tool. Let’s explore each method in detail.
Using the Print Screen Key
The Print Screen key, typically labeled as “PrtScn” or similar, is a versatile tool for capturing screenshots. Pressing this key captures a screenshot of your entire screen and copies it to the clipboard. To save the screenshot, you will need to paste it into an image editing software, such as Paint, and save it from there.
Utilizing the Snipping Tool
The Snipping Tool is a powerful screenshot utility that allows you to capture specific parts of your screen. You can access the Snipping Tool by searching for it in the Start Menu. Once opened, you can use the various snipping modes, such as Free-form, Rectangular, Window, or Full-screen snip, to capture the desired area. After capturing the snip, you can save it directly or annotate it using the built-in editing tools.
Taking Advantage of the Snip & Sketch Tool
The Snip & Sketch Tool is an improved version of the Snipping Tool available in Windows 10. To open the Snip & Sketch Tool, press the Windows key + Shift + S. This tool allows you to capture screenshots using snipping modes similar to the Snipping Tool. However, the Snip & Sketch Tool offers additional features, such as delayed snip and easy sharing options.
Saving and Editing Your Screenshots
Once you have captured a screenshot, it is essential to know where it gets saved and how you can edit it if needed.
Where Your Screenshots Get Saved
By default, Windows 10 saves your screenshots in the “Pictures” folder under a sub-folder called “Screenshots.” However, you can easily change the save location to a folder of your choice. To do this, right-click on the “Screenshots” folder, select “Properties,” and navigate to the “Location” tab.
Basic Editing Tools in Windows 10
Windows 10 provides basic editing tools to enhance your screenshots. After capturing a screenshot, you can open it in an image editing software, such as Paint or Photos, to crop, resize, add text, draw, or apply filters to your screenshot. These editing features allow you to customize your screenshots to suit your needs and make them more visually appealing.
Troubleshooting Common Screenshot Issues
While capturing screenshots on Windows 10 is generally straightforward, you may encounter some common issues. By understanding and resolving these issues, you can ensure that your screenshot captures are of the highest quality.
Dealing with Unresponsive Keys
If your Print Screen key or any other key combination doesn’t appear to work, it could indicate a software conflict or a specific setting preventing screenshot capture. One common solution is to restart your laptop and try taking the screenshot again. Additionally, you can check your keyboard settings in the Control Panel to ensure that your key combinations are not modified.
Resolving Screenshot Quality Issues
If your screenshots appear blurry or pixelated, it could be due to a variety of factors. Try capturing the screenshot at a higher resolution or using a different snipping mode. If the issue persists, check your display settings to ensure that the resolution is set correctly. Additionally, closing unnecessary applications or updating your graphics drivers may also improve screenshot quality.
By following the steps outlined in this article, you can confidently capture and save screenshots on your laptop with Windows 10. Whether you need to share important information, troubleshoot technical problems, or simply enhance your communication, screenshots are an invaluable tool in the digital world. Start utilizing the power of screenshots today and unlock a whole new level of productivity and efficiency.
Enhance Your Screenshots with GIFCaster
Ready to take your screenshot game to the next level? With GIFCaster, not only can you capture important moments on your Windows 10 laptop, but you can also add a touch of personality and fun to your images. Make your screenshots stand out by incorporating animated GIFs, transforming standard captures into engaging, creative expressions. Whether it’s a celebratory moment at work or just a way to spice up your digital communication, GIFCaster is here to enliven your messages. Don’t settle for ordinary screenshots—use the GIFCaster App today and start creating unforgettable images that capture more than just a screen.