In this comprehensive guide, we will walk you through the process of editing a screenshot photo step by step. Whether you are a beginner or an experienced user, you will find valuable information that will help you enhance your screenshots and make them more visually appealing.
Understanding the Basics of Screenshot Editing
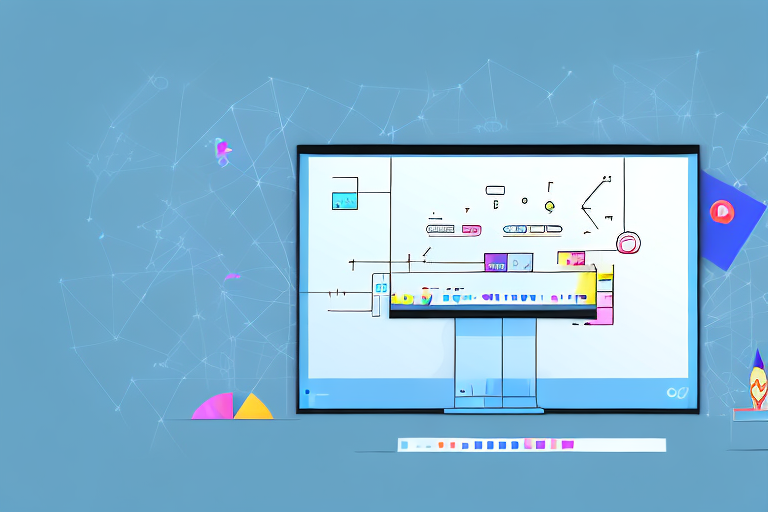
Screenshot editing is the process of modifying and enhancing a screenshot image to make it more informative, visually appealing, and easier to understand. It involves using various editing tools and techniques to highlight important areas, add annotations, adjust colors, and improve overall quality.
What is Screenshot Editing?
Screenshot editing is the practice of modifying captured screenshots by using specialized software to enhance their visual quality and convey information more effectively. It allows you to add text, shapes, arrows, and other elements that can help you convey your message clearly.
Importance of Screenshot Editing
Screenshot editing plays a crucial role in various fields such as software development, documentation, tutorials, and presentations. By editing your screenshots, you can emphasize important details, provide step-by-step instructions, and create visually appealing visuals that engage your audience.
In software development, screenshot editing is often used to showcase new features or demonstrate bugs. By highlighting specific areas or adding annotations, developers can effectively communicate their findings to their team or clients. This helps in streamlining the development process and ensuring that everyone is on the same page.
Documentation is another area where screenshot editing is highly valuable. When creating user manuals or technical guides, screenshots are often used to illustrate the steps involved in a process. By editing these screenshots, you can draw attention to key elements, such as buttons or menu options, making it easier for readers to follow along and understand the instructions.
Tutorials and online courses also benefit greatly from screenshot editing. By enhancing screenshots with annotations, arrows, and text, instructors can provide clear instructions and guide learners through complex concepts. This visual aid helps learners grasp the material more easily and reinforces their understanding.
Presentations are another area where screenshot editing can make a significant impact. Whether you are presenting to clients, colleagues, or stakeholders, incorporating edited screenshots can make your presentation more engaging and visually appealing. By highlighting important information or using visual cues, you can effectively convey your message and capture your audience’s attention.
Furthermore, screenshot editing allows you to adjust colors, brightness, and contrast, improving the overall quality of the image. This ensures that the screenshot is visually appealing and easy to comprehend, even when viewed on different devices or platforms.
In conclusion, screenshot editing is a valuable skill that can enhance the effectiveness of your visuals in various fields. By using specialized software and techniques, you can create visually appealing screenshots that convey information clearly, engage your audience, and improve overall understanding.
Preparing Your Screenshot for Editing
Before diving into the editing process, it’s important to ensure that you have a high-quality screenshot and the right editing software. Let’s explore the steps you should follow to prepare your screenshot for editing.
When it comes to capturing a high-quality screenshot, there are a few key factors to consider. Firstly, you want to make sure that the content you want to capture is clear and visible on your screen. This means adjusting the size and position of windows or elements on your screen to ensure they are easily readable in the final screenshot.
Once you have arranged your screen to capture the desired content, you can proceed to capture the screenshot itself. There are several methods you can use, depending on your operating system. For example, on Windows, you can use the “Print Screen” button on your keyboard to capture the entire screen, or the “Alt + Print Screen” combination to capture just the active window. On Mac, you can use the “Command + Shift + 3” combination to capture the entire screen, or “Command + Shift + 4” to capture a specific area.
It’s important to note that the quality of your screenshot can greatly impact the editing process. Avoid capturing blurry or pixelated images, as they can make it difficult to make precise edits and adjustments later on. If you notice any blurriness or pixelation in your screenshot, consider adjusting the resolution or zoom level of your screen before capturing the image.
Taking a High-Quality Screenshot
To capture a high-quality screenshot, make sure that the content you want to capture is clear and visible on your screen. Use the appropriate keyboard shortcuts or screenshot tools to capture the entire screen or a specific area. Avoid capturing blurry or pixelated images, as they can impact the editing process.
Additionally, it’s worth mentioning that the lighting conditions in your environment can also affect the quality of your screenshot. If possible, try to capture your screenshot in a well-lit area to ensure optimal clarity and visibility of the captured content.
Once you have successfully captured a high-quality screenshot, you can move on to the next step: choosing the right editing software.
Choosing the Right Editing Software
Selecting the right editing software is essential for a seamless editing experience. With the wide range of options available, it’s important to consider your specific requirements, budget, and desired features when making your choice.
If you’re looking for a quick and easy editing solution, there are many online editors available that offer basic editing tools. These online editors are often free to use and require no installation, making them convenient for simple editing tasks.
On the other hand, if you require more advanced editing capabilities and a greater level of control over your edits, you may want to consider desktop applications. Software such as Adobe Photoshop or GIMP offer a wide range of features and tools for editing screenshots, including the ability to adjust colors, crop and resize images, add text or annotations, and much more.
When choosing your editing software, it’s also important to consider your familiarity with the application. If you’re already comfortable with a particular software, it may be more efficient to stick with what you know rather than learning a new program.
Ultimately, the choice of editing software will depend on your specific needs and preferences. Take the time to explore different options, read reviews, and consider your budget before making a decision.
Step-by-Step Process of Editing a Screenshot
Now that you have your screenshot and the editing software ready, let’s dive into the step-by-step process of editing a screenshot. This section will guide you through the essential steps from opening your screenshot in the editing software to applying advanced editing techniques.
Opening Your Screenshot in the Editing Software
Launch your chosen editing software and import your screenshot into the editing workspace. Most editing software allows you to drag and drop the file onto the interface or use the “Open” option from the menu. Once your screenshot is loaded, you can proceed with the editing process.
Basic Editing Tools and Their Functions
Before exploring advanced techniques, familiarize yourself with the basic editing tools. These tools usually include cropping, resizing, adding text, drawing shapes, applying filters, and adjusting brightness and contrast. Each editing tool serves a specific purpose, so take the time to experiment with them and understand their functions.
Advanced Editing Techniques for Screenshots
Once you are comfortable with the basic editing tools, you can explore advanced techniques to further enhance your screenshots. These techniques may include removing backgrounds, adding drop shadows, applying gradients, using layer masks, or combining multiple screenshots into a single image. Experiment with these techniques to create unique and visually appealing screenshots.
Saving and Sharing Your Edited Screenshot
Now that you have completed the editing process, it’s time to save and share your edited screenshot. Follow these steps to ensure that your edited screenshot is saved in the best format and effortlessly shared with others.
Best Formats for Saving Screenshots
When saving your edited screenshot, consider the purpose and platform on which you will be using it. For online sharing, JPEG or PNG formats are commonly used. If you require high-quality prints, consider saving your screenshot in TIFF or PSD formats to preserve the image quality.
Sharing Your Edited Screenshot Effectively
Once your screenshot is saved, you can share it in various ways depending on your requirements. You can attach it to an email, publish it on a website, share it on social media platforms, or incorporate it into a presentation. Choose the method that suits your needs and target audience.
Troubleshooting Common Screenshot Editing Issues
Even with the best preparation and editing techniques, you may encounter some common issues while editing screenshots. This section will address a few troubleshooting tips to help you overcome these challenges.
Dealing with Low-Quality Screenshots
If your screenshot has low resolution or appears pixelated, try zooming in to focus on smaller sections or consider using editing tools that can enhance sharpness and clarity. Additionally, double-check your settings when capturing the screenshot to ensure optimal quality.
Overcoming Software Compatibility Issues
If you encounter compatibility issues between your editing software and the screenshot file format, try converting the file into a more widely supported format, such as JPEG or PNG. This will ensure that your screenshot can be opened and edited without any compatibility hurdles.
With this step-by-step guide, you now have the knowledge and tools to edit your screenshot photos effectively. Remember to experiment with different techniques and explore the features of your chosen editing software. With practice, you will master the art of screenshot editing and be able to customize your screenshots to suit your specific needs and preferences.
Take Your Screenshot Editing to the Next Level with GIFCaster
Ready to add a dash of fun and creativity to your screenshots? With GIFCaster, you can elevate your edited images by incorporating animated GIFs that capture attention and express your personality. Whether you’re celebrating a milestone or just want to make your work messages stand out, GIFCaster is the perfect tool to bring your screenshots to life. Don’t settle for ordinary images; use the GIFCaster App today and start creating engaging, animated visuals that truly reflect your unique style.