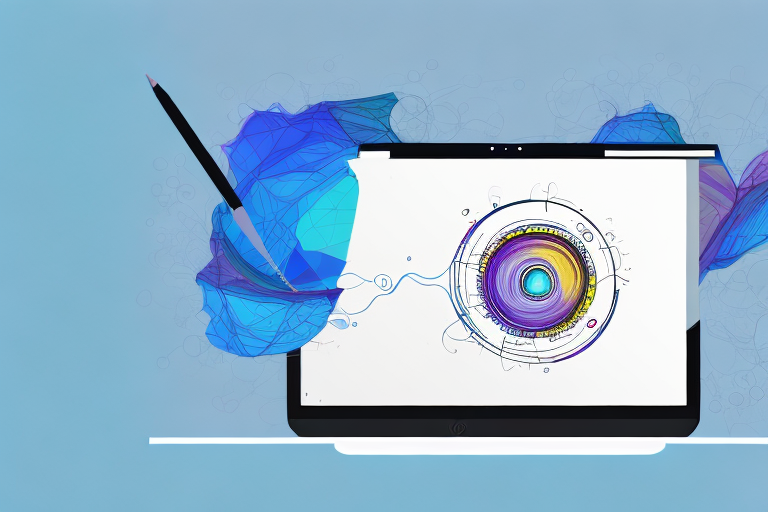
Screenshots are a useful and convenient way to capture and preserve information on your laptop. Whether you need to save an important document, share interesting content, or troubleshoot a technical issue, knowing how to edit a screenshot can greatly enhance your communication. In this article, we will guide you through the process of editing screenshots on your laptop, providing tips and techniques along the way.
Understanding the Basics of Screenshots
Before diving into the editing process, it’s important to understand what exactly a screenshot is. A screenshot is essentially a digital image of your laptop’s screen at a given moment. It captures everything that is currently displayed on your screen, including open windows, menus, and icons. This makes screenshots a powerful tool for capturing visual information that can be difficult to explain with words alone.
But let’s delve a little deeper into the world of screenshots and explore their various uses and benefits.
What is a Screenshot?
In simple terms, a screenshot is a snapshot of your laptop’s screen. It allows you to freeze a particular moment and save it as an image file. Screenshots are often used to illustrate tutorials, share error messages, or capture memorable moments from videos or games.
Imagine you’re following a step-by-step tutorial on how to edit a photo using a specific software. Instead of struggling to understand the instructions, a screenshot can provide a visual reference, making it easier to follow along and replicate the desired outcome. Similarly, if you encounter an error message on your laptop, taking a screenshot of it can help you seek assistance from technical support or share the issue with others for troubleshooting.
Screenshots are not limited to practical purposes alone. They can also be used to capture memorable moments from videos or games. Whether it’s a stunning scenery in a virtual world or a hilarious moment during a gameplay session, screenshots allow you to preserve and share these experiences with others.
Different Methods to Take a Screenshot
Now that we understand the significance of screenshots, let’s explore the different methods to capture them on a laptop, depending on the operating system you are using.
If you’re using a Windows laptop, one of the simplest ways to take a screenshot is by using the “Print Screen” button. Pressing this button captures the entire screen and saves it to the clipboard. You can then paste the screenshot into an image editing software or a document of your choice.
Alternatively, if you only want to capture the active window, you can use the “Alt + Print Screen” combination. This allows you to focus on a specific window or application without including the entire screen in the screenshot.
For Mac users, the process is slightly different. Pressing “Command + Shift + 3” captures the whole screen and saves it as a file on your desktop. This method is useful when you want to capture everything on your screen in one go.
If you prefer to capture a selected area instead of the entire screen, you can use the “Command + Shift + 4” combination. This turns your cursor into a crosshair, allowing you to drag and select the desired area for the screenshot. Once selected, the screenshot is saved as a file on your desktop.
These are just a few examples of the methods available to take screenshots on laptops. Depending on your specific device and operating system, there may be additional options or variations to explore.
Now that you have a better understanding of what screenshots are and how to capture them, you can start leveraging this powerful tool to enhance your digital experiences, communicate more effectively, and capture moments worth remembering.
Preparing for Screenshot Editing
Before you start editing your screenshots, it’s important to have the right tools and software in place. Here are some essential considerations:
Editing screenshots can be a fun and creative process that allows you to enhance and customize your images. Whether you’re editing screenshots for personal use or professional projects, having the right software and tools can make a significant difference in the quality of your edits.
Choosing the Right Software
There are numerous software options available for editing screenshots on a laptop. Some popular choices include Adobe Photoshop, Snagit, and GIMP. Each software has its own unique features and capabilities, so it’s important to consider your editing needs and budget when selecting the software that suits you best.
Adobe Photoshop is a powerful and versatile software that offers a wide range of editing tools and effects. It is widely used by professionals in various industries and provides advanced features for precise editing and manipulation of screenshots.
Snagit is a user-friendly software that is known for its simplicity and ease of use. It offers a variety of editing tools and allows you to capture screenshots with just a few clicks. Snagit is a great option for beginners or those who prefer a straightforward editing process.
GIMP, which stands for GNU Image Manipulation Program, is a free and open-source software that provides a comprehensive set of tools for editing screenshots. It offers a wide range of features and is a popular choice among users who are looking for a cost-effective editing solution.
Essential Tools for Screenshot Editing
When editing screenshots, there are a few key tools that can significantly enhance your editing capabilities. Familiarize yourself with these tools to make the most of your editing process:
Cropping: Cropping allows you to remove unwanted parts of the screenshot and focus on the most important elements. It helps in improving composition and eliminating distractions.
Resizing: Resizing enables you to adjust the dimensions of the screenshot to fit specific requirements. Whether you need to make it smaller for web use or larger for print, resizing ensures that your screenshots are displayed correctly.
Text Overlay: Adding text overlay to your screenshots can be useful for providing context, labeling specific elements, or adding captions. It allows you to convey information effectively and make your screenshots more informative.
Drawing Shapes: Drawing shapes such as arrows, circles, or rectangles can help highlight important areas or guide the viewer’s attention. It adds visual interest and makes your screenshots more visually appealing.
Adding Annotations: Annotations are a great way to provide additional information or explanations within your screenshots. Whether it’s adding arrows, lines, or callouts, annotations help clarify complex concepts and make your screenshots more comprehensive.
By utilizing these essential tools, you can take your screenshot editing to the next level. Experiment with different techniques and explore the features of your chosen software to unlock your creativity and achieve professional-looking results.
Step-by-Step Guide to Editing a Screenshot
Now that you have the necessary tools and software, let’s dive into the step-by-step process of editing a screenshot on your laptop:
Opening Your Screenshot in the Editor
The first step is to open your screenshot in the editing software of your choice. Most software options will allow you to drag and drop the screenshot file directly into the workspace. Once opened, you will have a canvas where you can make your desired edits.
Basic Editing Techniques
Begin your editing process by utilizing basic techniques such as cropping, resizing, and adjusting brightness or contrast. Cropping allows you to focus on specific areas of the screenshot, while resizing ensures it fits seamlessly into your desired context. Adjusting brightness and contrast can enhance the overall appearance of the image.
Advanced Editing Techniques
If you want to take your screenshot editing skills to the next level, consider exploring advanced techniques. This may include retouching, removing unwanted elements, adding effects, or utilizing advanced layering techniques. Experiment with different techniques to find your own style.
Saving and Sharing Your Edited Screenshot
After you are satisfied with your edited screenshot, it’s time to save and share your work:
Best Practices for Saving Your Work
When saving your edited screenshot, it’s crucial to choose the appropriate file format and resolution. Consider the purpose of the screenshot and the platform on which it will be shared. Optimize the file size without compromising the quality to ensure efficient storage and quick loading times.
Sharing Your Screenshot Effectively
Now that your screenshot is edited and saved, it’s time to share it with others. When sharing, consider the most appropriate channels, such as social media, email, or online platforms. Provide context or a caption to help viewers understand the purpose or message behind the screenshot.
Troubleshooting Common Issues
While editing screenshots, you may encounter common issues that can hinder the editing process. Here are some troubleshooting tips:
Dealing with Poor Image Quality
If your screenshot appears blurry or pixelated, it’s likely due to low image resolution. Consider retaking the screenshot at a higher resolution or using software tools to enhance the image quality. Experiment with sharpening and noise reduction techniques to improve the overall appearance.
Overcoming Software Problems
Occasionally, you may face software-related issues that hinder your editing process. Ensure that you have the latest version of your editing software installed and check for any updates or bug fixes. If problems persist, explore alternative software options or seek assistance from online forums or support channels.
By following this step-by-step guide, you can now confidently edit screenshots on your laptop. Remember to choose the right software, utilize essential editing tools, and explore both basic and advanced editing techniques. Additionally, adopt best practices for saving and sharing your work while troubleshooting any common issues that may arise. Happy editing!
Bring Your Screenshots to Life with GIFCaster
Ready to elevate your screenshot editing experience? With GIFCaster, you can infuse your static images with the magic of animation. Add a touch of personality and fun to your screenshots by incorporating GIFs that express your creativity and turn everyday communication into a delightful interaction. Don’t let your messages be mundane; let them celebrate the moment! Start using the GIFCaster App today and transform your screenshots into engaging, animated conversations.