If you frequently take screenshots on your iPhone, you may have found yourself wanting to edit the text within those screenshots. Whether it’s adding a caption or making corrections, being able to edit screenshot text directly on your device can be a game-changer. In this article, we will guide you through the process of editing screenshot text on your iPhone, from understanding the basics to mastering the editing tools. With these tips and tricks, you’ll be able to make your screenshots look polished and professional.
Understanding the Basics of Screenshot Text Editing
Before diving into the process of editing screenshot text, it’s essential to understand what this feature entails. Screenshot text editing refers to the ability to modify or add text to the content captured in a screenshot. Whether you want to annotate an image, highlight important information, or add context to a screenshot, this functionality can be incredibly useful in various scenarios.
What is Screenshot Text Editing?
Screenshot text editing is a feature that allows you to add, delete, or modify the text within a screenshot directly on your iPhone. This feature is especially handy when you need to share a screenshot with text that requires editing or annotation.
Imagine you have taken a screenshot of a conversation that contains important information. With screenshot text editing, you can easily add additional details or explanations to clarify the context of the conversation. This can be particularly useful when sharing screenshots with colleagues, clients, or friends.
Furthermore, screenshot text editing enables you to highlight specific sections of the screenshot by adding text boxes or callouts. By doing so, you can draw attention to important points or emphasize certain details, making it easier for others to understand the content you are sharing.
Importance of Screenshot Text Editing
The ability to edit screenshot text on your iPhone offers several benefits. Firstly, it saves you from the hassle of transferring the screenshot to a computer or using third-party applications for editing. With screenshot text editing, you can make the necessary changes directly on your device, eliminating the need for additional tools or software.
Moreover, being able to edit text on your iPhone provides greater convenience and speed. Instead of going through a lengthy process of transferring the screenshot to a computer, opening an editing software, making the changes, and then transferring it back to your iPhone, you can simply edit the text on the spot. This saves you valuable time and allows you to make quick changes and share the updated screenshot immediately.
Additionally, screenshot text editing enhances collaboration and communication. When working on a project or discussing ideas with others, being able to edit screenshot text allows you to provide clear instructions, highlight important details, or share feedback more effectively. This can improve productivity and ensure that everyone involved is on the same page.
In conclusion, screenshot text editing is a valuable feature that offers convenience, speed, and enhanced communication. Whether you need to annotate, clarify, or emphasize information within a screenshot, this functionality on your iPhone allows you to make the necessary changes easily and efficiently.
Preparing Your iPhone for Screenshot Text Editing
Before you can start editing screenshot text on your iPhone, there are a few preparatory steps you need to take to ensure a smooth experience.
Editing text on your iPhone’s screenshots can be a convenient way to add annotations, highlight important information, or simply make notes for future reference. By following these steps, you’ll be well-equipped to make the most out of this feature.
Checking Your iOS Version
Make sure that your iPhone is running on an iOS version that supports screenshot text editing. This feature was introduced with iOS 13, so if you haven’t updated your device in a while, it’s a good idea to check and install any available updates for optimal performance.
Updating your iOS not only ensures that you have access to the latest features and improvements but also provides a more stable environment for text editing on screenshots. To check for updates, go to your iPhone’s Settings, tap on “General,” and then select “Software Update.” If there are any updates available, follow the on-screen instructions to download and install them.
Setting Up Your Editing Tools
Prior to diving into screenshot text editing, it’s essential to familiarize yourself with the markup tools available on your iPhone. These tools, such as the pen, highlighter, and text insertion, can be accessed through the Markup feature within the Photos app. Take a moment to explore the various options and practice using them to get comfortable with the editing process.
When you open a screenshot in the Photos app, tap on the “Edit” button, which will reveal the Markup feature. From there, you can select the desired tool, adjust its size and color, and start editing the text on your screenshot. The pen tool allows you to draw freehand, while the highlighter lets you emphasize specific words or phrases. Additionally, the text insertion tool enables you to add new text or edit existing text on the screenshot.
Experiment with different colors, line thicknesses, and fonts to find the style that suits your preferences. You can also undo or redo any changes you make, ensuring that your screenshot text editing is precise and professional-looking.
By taking the time to familiarize yourself with these editing tools, you’ll be able to enhance your screenshots with ease and efficiency. Whether you’re annotating screenshots for work, studying, or personal use, having a good grasp of the available tools will significantly improve your editing experience.
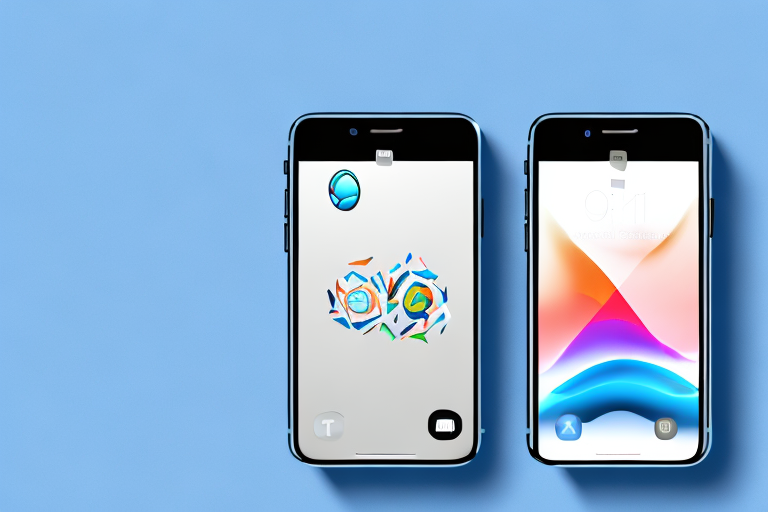
Taking a Screenshot on Your iPhone
Before you can edit screenshot text, you need to capture the desired content on your iPhone. There are a couple of methods you can use to take a screenshot:
Using Button Combinations for Screenshots
One of the easiest ways to take a screenshot on your iPhone is by using button combinations. Simply press the Home button and the Power button (or the Volume up button on iPhone X or later models) simultaneously. This action triggers the screenshot function, and you’ll see a flash on your screen, hear a camera shutter sound, and the screenshot will be saved to your device’s Camera Roll.
Button combinations are a quick and convenient way to capture your screen, especially if you need to take a screenshot in a hurry. Whether you want to save a funny conversation, capture a memorable moment in a game, or document an important piece of information, using button combinations is a reliable method that works across all iPhone models.
Utilizing Assistive Touch for Screenshots
If you prefer a more hands-free approach to taking screenshots, you can enable Assistive Touch on your iPhone. Assistive Touch is a feature that adds a virtual button to your screen, allowing you to perform various functions without using the physical buttons on your device.
To enable Assistive Touch, go to your iPhone’s Settings, then tap on “Accessibility.” From there, select “Touch,” and under the “Physical and Motor” section, you’ll find the “AssistiveTouch” option. Toggle it on, and you’ll see a small, transparent button appear on your screen.
Once Assistive Touch is enabled, taking a screenshot becomes even easier. All you have to do is tap on the Assistive Touch button, which brings up a menu with various options. Tap on “Device,” then “More,” and finally, “Screenshot.” Your iPhone will capture the screen, and you’ll see a flash animation, hear a camera shutter sound, and the screenshot will be saved to your Camera Roll, just like with the button combinations method.
Assistive Touch is particularly useful if your physical buttons are not functioning correctly or if you find it challenging to press the Home button and Power button simultaneously. It provides an accessible alternative that ensures you can still take screenshots effortlessly.
Accessing and Using the Markup Tool
Once you have taken a screenshot, it’s time to access the markup tool and begin editing the text within the image.
Navigating to Your Screenshot
To locate your screenshot, open the Photos app on your iPhone and tap on the “Albums” tab at the bottom. Look for the “Screenshots” album, and select the screenshot you want to edit.
Opening the Markup Tool
When you have your screenshot open, locate and tap on the “Edit” button in the top-right corner of the screen. This action will reveal a list of editing options, including the Markup tool.
Familiarizing Yourself with Markup Features
Once you have accessed the Markup tool, take some time to explore its features and functionalities. You can choose different colors, adjust the line thickness, and experiment with different fonts. Getting acquainted with these options will enhance your editing capabilities and allow you to achieve the desired results.
Editing Text in Your Screenshot
Now that you are well-versed in the markup tools, it’s time to edit the text within your screenshot to suit your needs.
Adding Text to Your Screenshot
If you want to add text to your screenshot, tap on the “+” icon in the Markup tool. This will create a text box on the image where you can enter the desired text. You can position the text box anywhere on the screenshot and resize it as needed to ensure a neat and organized appearance.
Modifying Existing Text in Your Screenshot
If you need to modify the text within your screenshot, select the text box by tapping on it. You can then make changes such as deleting or replacing the existing text. Utilize the editing options available in the Markup tool to customize the font, size, and style of the text to match your preferences.
By following these step-by-step instructions, you can easily edit screenshot text directly on your iPhone. Whether you need to add important information, correct errors, or enhance the overall visual appeal of your screenshots, mastering this feature will undoubtedly elevate your screenshot editing game. With a little practice and experimentation, you’ll become proficient in editing screenshot text on your iPhone, ensuring that your visual content always conveys the intended message with precision and clarity.
Take Your Screenshots to the Next Level with GIFCaster
Now that you’ve mastered editing text in your screenshots, why not add a touch of creativity and fun to them? With GIFCaster, you can bring your screenshots to life by adding animated GIFs. Whether it’s turning a mundane work update into a celebratory moment or expressing your thoughts with more than just words, GIFCaster enhances your visual communication in an engaging way. Ready to animate your screenshots? Use the GIFCaster App today and make every share a memorable one!