The Galaxy S7 is a popular smartphone that offers a multitude of features, one of which is the ability to capture screenshots. Screenshots are incredibly useful for quickly capturing and sharing information, whether it be a funny conversation, an important document, or a memorable moment in a video. In this article, we will explore the various methods and techniques to take screenshots on a Galaxy S7, as well as how to manage and edit your screenshots. We will also address common issues and provide troubleshooting tips to ensure that you can successfully take screenshots with ease. So without further ado, let’s dive into the world of Galaxy S7 screenshots!
Understanding the Basics of a Galaxy S7
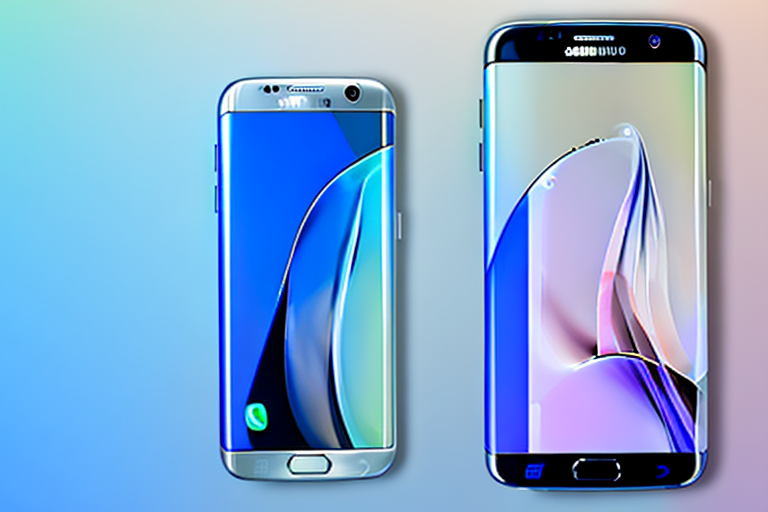
Before we delve into the specifics of taking screenshots on a Galaxy S7, it’s essential to familiarize ourselves with the phone’s layout and interface. Knowing the physical layout of the device and understanding how to navigate the interface will greatly assist you in seamlessly capturing screenshots. Let’s begin by exploring the physical layout of a Galaxy S7.
The Physical Layout of a Galaxy S7
The Galaxy S7 boasts a sleek and slim design, with a vibrant screen that provides an excellent viewing experience. On the front of the device, you will find the display, along with the home button situated at the bottom center. The power button is located on the right side, while the volume buttons can be found on the left side. At the top, you will see the SIM card tray and the microphone. The bottom of the device houses the charging port, speaker grill, and headphone jack.
Now that you have a good grasp of the physical layout let’s move on to understanding how to navigate the interface of your Galaxy S7.
Navigating the Galaxy S7 Interface
The Galaxy S7 operates on Android, a user-friendly operating system that offers a smooth and intuitive interface. To navigate your phone, you can use the touch screen, home button, and various gestures. The home screen is your starting point, and you can customize it by adding widgets, apps, and shortcuts to your favorite features. Swiping left or right allows you to access additional home screens, while swiping down from the top reveals the notification panel. From the home screen, you can also access the app drawer by tapping on the app icon at the bottom center of the screen. Familiarizing yourself with these basic navigation techniques will make capturing screenshots a breeze.
Preparing Your Galaxy S7 for Screenshots
Before we jump into the different methods of taking screenshots on a Galaxy S7, it’s important to ensure that your device is ready for capturing those memorable moments. Let’s go through a couple of essential steps to prepare your Galaxy S7 for screenshots.
Checking Your Device’s Software Version
It’s always a good idea to keep your device’s software up to date. Having the latest software version ensures that you have access to the latest features and improvements. To check for updates on your Galaxy S7, follow these steps:
- Go to Settings by tapping on the gear icon in the app drawer or swiping down from the top and tapping the gear icon in the notification panel.
- Scroll down and tap on “Software update.”
- Tap on “Download updates manually” to check for available updates.
- Follow the on-screen instructions to download and install the latest software version if an update is available.
Enabling Necessary Settings for Screenshots
By default, the Galaxy S7 is equipped with all the necessary settings to capture screenshots. However, it doesn’t hurt to double-check and make sure everything is properly enabled. Here’s how you can do it:
- Go to Settings by tapping on the gear icon in the app drawer or swiping down from the top and tapping the gear icon in the notification panel.
- Scroll down and tap on “Advanced features.”
- Tap on “Screenshots and screen recorder.”
- Ensure that the “Palm swipe to capture” option is enabled. If not, tap on the toggle switch to enable it.
- Take a moment to explore other available settings and customize them according to your preferences.
Different Methods to Take Screenshots on a Galaxy S7
Now that your Galaxy S7 is fully prepared, it’s time to learn the different methods of capturing screenshots on your device. There are three main methods available, each with its unique approach. Let’s dive in and explore each method.
Using the Button Combination Method
The first method involves using a combination of physical buttons on your Galaxy S7. Here is how you can take a screenshot using the button combination method:
- Open the screen you want to capture.
- Simultaneously press and hold the power button and the home button for a brief moment.
- You will hear a sound or see a brief animation indicating that the screenshot has been successfully captured.
- To view the screenshot, navigate to the Gallery app and look for the “Screenshots” folder. Your screenshot should be saved there.
This method is straightforward and works in any application or screen on your device.
Utilizing the Palm Swipe Feature
If pressing physical buttons isn’t your thing, don’t worry! The Galaxy S7 offers a convenient gesture called the palm swipe feature, which allows you to capture screenshots with a simple swipe of your hand. Follow these steps to utilize the palm swipe feature:
- Go to Settings by tapping on the gear icon in the app drawer or swiping down from the top and tapping the gear icon in the notification panel.
- Scroll down and tap on “Advanced features.”
- Tap on “Motions and gestures.”
- Toggle the switch next to “Palm swipe to capture” to enable the feature.
- Now, open the screen you want to capture.
- Gently slide the edge of your hand horizontally across the screen, from right to left or left to right.
- You will hear a sound or see a brief animation indicating that the screenshot has been successfully captured.
- Retrieve your screenshot from the “Screenshots” folder in the Gallery app.
The palm swipe feature provides a quick and effortless way to capture screenshots, especially if you find yourself without a free hand.
Taking Screenshots with the Scroll Capture Option
The last method we will cover is ideal for capturing lengthy content that requires scrolling, such as web pages or articles. The scroll capture option allows you to take multiple screenshots and stitch them together into one image. Follow these steps to utilize the scroll capture option:
- Open the screen that contains the content you want to capture.
- Take a screenshot using either the button combination method or the palm swipe feature.
- After capturing the first screenshot, a toolbar will appear at the bottom of the screen.
- Tap on “Capture more” or the icon that resembles a downward-pointing arrow.
- The screen will scroll down, and a new screenshot will be captured. Repeat this step until you have captured all the desired content.
- Tap on “Done” or the icon that resembles a checkmark to finalize the scroll capture.
- Be sure to save the stitched image as a screenshot in the “Screenshots” folder of the Gallery app.
The scroll capture option is especially handy when you want to capture an entire page or article without the hassle of taking multiple individual screenshots and arranging them manually.
Managing and Editing Your Screenshots
Now that you’ve successfully captured screenshots on your Galaxy S7, it’s time to learn how to manage and edit them. Let’s explore the necessary steps to access your screenshots and utilize basic editing tools to enhance them.
Accessing Your Screenshots in the Gallery
All the screenshots you capture on your Galaxy S7 are automatically saved in the “Screenshots” folder of the Gallery app. Here’s how you can access your screenshots:
- Locate and tap on the “Gallery” app on your device.
- Navigate to the “Screenshots” folder.
- You will find all your captured screenshots organized here.
Basic Editing Tools for Your Screenshots
The Gallery app offers basic editing tools that allow you to enhance your screenshots with ease. While more advanced editing options are available through third-party apps, the built-in tools are sufficient for most basic editing needs. Here are some of the essential editing functions available in the Gallery app:
- Cropping: Allows you to crop your screenshot to remove unwanted elements or focus on a specific area.
- Adjusting Brightness: Enables you to modify the brightness level of your screenshot, enhancing visibility.
- Applying Filters: Provides preset filters that can add a touch of creativity to your screenshots.
- Adding Text: Lets you include text captions or annotations to your screenshots.
Experiment with these editing tools to personalize and enhance your screenshots to cater to your needs and preferences.
Troubleshooting Common Screenshot Issues
While capturing screenshots on a Galaxy S7 is typically a straightforward process, it’s not uncommon to encounter some issues along the way. Let’s address a few common problems and provide troubleshooting tips to help you overcome them.
What to Do When Screenshot Feature Doesn’t Work
If you find that the screenshot feature isn’t working as expected, try the following troubleshooting steps:
- Restart your device: A simple restart can often solve minor software glitches.
- Ensure palm swipe feature is enabled: Double-check if the palm swipe feature is enabled in the “Motions and gestures” settings menu.
- Clear cache partition: Clearing the cache partition can help resolve system-related issues. To do this, follow the steps below:
- Power off your Galaxy S7.
- Press and hold the volume up button, home button, and power button simultaneously.
- Once the phone vibrates and the Android system recovery screen appears, release all the buttons.
- Use the volume down button to navigate to the “Wipe cache partition” option.
- Press the power button to select the option.
- Wait for the process to complete, then use the volume down button to navigate to the “Reboot system now” option.
- Press the power button to restart your device.
If the above steps fail to resolve the issue, it may be worth considering resetting your device to factory settings or reaching out to Samsung support for further assistance.
Solving Issues with Screenshot Quality
Occasionally, you may find that the quality of your screenshots doesn’t meet your expectations. To optimize the quality of your screenshots, consider the following tips:
- Ensure sufficient lighting: Bright lighting conditions can greatly improve the quality of your screenshots. Avoid capturing screenshots in dimly lit areas or under harsh lighting.
- Clean your screen: Smudges, fingerprints, or dust on your screen can affect the clarity of your screenshots. Wipe your screen with a soft, lint-free cloth before capturing screenshots.
- Use the scroll capture option for long content: If you are capturing lengthy content, such as web pages, using the scroll capture option can ensure a high-quality, seamless image.
By following these tips, you can enhance the quality of your screenshots and ensure a more satisfying result.
Conclusion
Capturing screenshots on a Galaxy S7 is a fantastic feature that can prove to be incredibly useful in various situations. Whether it’s sharing important information, preserving memorable moments, or troubleshooting technical issues, screenshots are a valuable tool in your smartphone arsenal. In this article, we explored the basics of a Galaxy S7, prepared the device for screenshots, learned different methods to capture screenshots, managed and edited our screenshots, and addressed common issues and troubleshooting tips. Armed with this knowledge, you are now equipped to take full advantage of your Galaxy S7’s screenshot capabilities. So go ahead, start capturing those precious moments and sharing them with the world!
Enhance Your Galaxy S7 Screenshots with GIFCaster
Ready to take your Galaxy S7 screenshots to the next level? With GIFCaster, you can add a touch of personality and fun to your captures. Transform a simple screen grab into an engaging visual message by incorporating GIFs that express your creativity and humor. Whether it’s a celebratory moment or just adding flair to your daily communications, use the GIFCaster App to make every screenshot an exciting visual experience. Start making your screenshots more memorable today!