Taking a screenshot on your Galaxy A53 smartphone can be a useful and convenient way to capture and save important information, memorable moments, or interesting content. Whether you’re a tech-savvy user or new to the world of smartphones, understanding the process can enhance your overall mobile experience. In this article, we will guide you through the entire process of taking a screenshot on your Galaxy A53, along with tips and troubleshooting advice.
Understanding the Basics of Galaxy A53
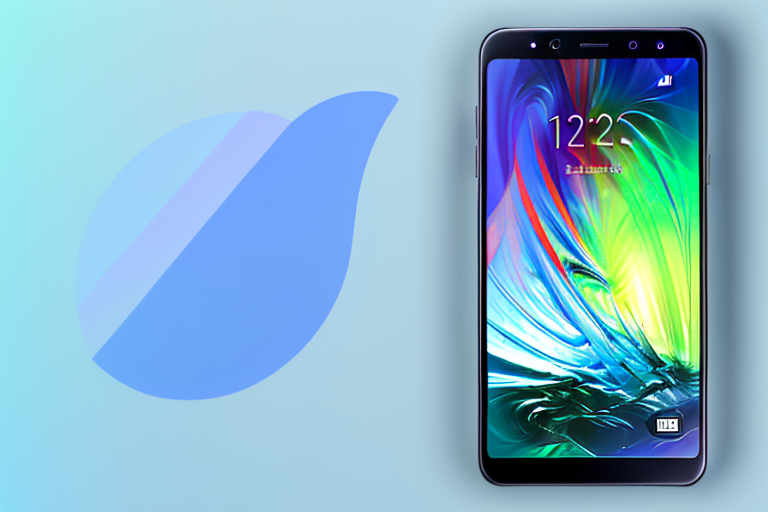
Before diving into the screenshot-taking process, let’s familiarize ourselves with the key features and navigation of the Galaxy A53 interface. The Galaxy A53 is equipped with cutting-edge technology, combining an impressive display, powerful cameras, and user-friendly software. Its vibrant and immersive screen provides an enjoyable viewing experience, perfect for multimedia consumption, gaming, and productivity tasks. Additionally, the interface is designed to be intuitive, making it easy for users to navigate and locate essential features.
When it comes to the display, the Galaxy A53 boasts a stunning Super AMOLED panel that delivers vibrant and sharp visuals. Whether you’re watching movies, browsing photos, or playing games, the colors will pop off the screen, providing a truly immersive experience. The high resolution ensures that every detail is crisp and clear, allowing you to fully appreciate the content on your device.
One of the standout features of the Galaxy A53 is its advanced camera system. With multiple lenses and cutting-edge technology, you can capture high-quality photos and videos with ease. The primary camera excels in various lighting conditions, ensuring that your shots are well-lit and detailed. Additionally, the wide-angle lens allows you to capture more of the scene, perfect for group photos or breathtaking landscapes. And let’s not forget about the front-facing camera, which delivers stunning selfies that are ready to be shared on social media.
Storage space is often a concern for smartphone users, but with the Galaxy A53, you can rest easy. It offers ample storage space to accommodate all your files, apps, and multimedia. Whether you’re a photography enthusiast with a vast collection of photos or a music lover with an extensive library, the Galaxy A53 has you covered. And if you ever find yourself running low on storage, you can easily expand it with a microSD card, giving you even more room to store your precious memories.
A long-lasting battery is crucial for staying connected throughout the day, and the Galaxy A53 delivers on that front as well. With its efficient hardware and optimized software, you can expect impressive battery life that keeps you going. Whether you’re browsing the web, streaming videos, or playing games, you won’t have to worry about constantly searching for a power outlet. And when it does come time to recharge, the Galaxy A53 supports fast charging, so you can quickly get back to using your device.
Navigating the Galaxy A53 Interface
To efficiently use your Galaxy A53, it’s important to understand how to navigate its interface. The interface is operated using a combination of touch gestures, buttons, and menus. The home screen provides quick access to your favorite apps and widgets, allowing you to personalize your device to suit your needs. You can easily rearrange icons, add widgets for at-a-glance information, and even change the wallpaper to reflect your style.
When you need to access an application that is not on the home screen, you can find it in the app drawer. The app drawer houses all your installed applications, neatly organized for easy access. You can scroll through the list or use the search function to quickly find the app you’re looking for. And if you want to keep your home screen clutter-free, you can create folders in the app drawer to group similar apps together.
Managing notifications and accessing essential settings is a breeze with the Galaxy A53. Simply swipe down from the top of the screen to reveal the notification shade, where you can see all your recent notifications at a glance. From there, you can take action on individual notifications or access the quick settings menu for convenient toggles and shortcuts. Whether you need to adjust the brightness, turn on Wi-Fi, or enable the flashlight, it’s all just a swipe and a tap away.
In conclusion, the Galaxy A53 is a feature-packed smartphone that offers an impressive display, powerful cameras, ample storage space, and long-lasting battery life. Its user-friendly interface makes it easy to navigate and locate essential features, ensuring a seamless user experience. Whether you’re a tech enthusiast or a casual user, the Galaxy A53 is sure to impress with its performance and versatility.
Preparing to Take a Screenshot
Before you can take a screenshot on your Galaxy A53, it’s important to ensure that your device settings are properly configured. By checking a few settings and options, you can ensure a seamless screenshot-taking experience.
Checking Your Device Settings
To begin, navigate to the settings menu of your Galaxy A53 and locate the “Advanced Features” or “Gestures” section. Within this section, you should find the settings related to screenshot-taking. Verify that the necessary options are enabled, such as “Palm swipe to capture” or “Button combination for screenshots.” It’s also a good idea to ensure that your screenshot storage location is set to your preferred destination, whether it’s the device’s internal storage or external SD card.
Ensuring Screen Content
Prior to taking a screenshot, it’s essential to ensure that the desired screen content is appropriately displayed on your Galaxy A53. Whether it’s a webpage, social media post, or a specific app screen, make sure everything is arranged as you want it to be captured. This step ensures that the screenshot serves its purpose effectively.
Different Methods to Take a Screenshot
Now that you’ve prepared your Galaxy A53 and identified the desired screen content, let’s explore the various methods available to capture a screenshot.
Using the Button Combination
The most straightforward method of taking a screenshot on the Galaxy A53 is by using a combination of physical buttons. Simply press the power button and the volume down button simultaneously for a few seconds. You should see a visual indication, such as a flash or a scrolling animation, confirming that the screenshot has been successfully captured. The screenshot will be saved in your device’s gallery, ready for further editing or sharing.
Using the Palm Swipe Feature
If you prefer a more hands-free approach, the Galaxy A53 offers the palm swipe feature for taking screenshots. Ensure that this feature is enabled in your device settings, under the “Advanced Features” or “Gestures” section. Once activated, place the side of your hand on the edge of the screen and swipe it horizontally across. Similar to the button combination method, you’ll receive a visual confirmation of the screenshot, and it will be saved in your device’s gallery.
Using the Assistive Menu
In addition to the button combination and palm swipe methods, the Galaxy A53 provides an Assistive Menu that allows for easy access to various functions, including the screenshot feature. To enable this menu, go to your device settings and navigate to the “Accessibility” or “Advanced Features” section, depending on your device’s software version. Once enabled, a floating button will appear on your screen, providing quick access to the screenshot function and other useful features. Simply tap the assistive menu button and select the screenshot option to capture the desired screen content.
Editing and Sharing Your Screenshot
After successfully capturing a screenshot on your Galaxy A53, you may want to make some edits or share it with others. Fortunately, the Galaxy A53 offers easy-to-use tools for editing and sharing screenshots.
Accessing Your Screenshots
All the screenshots you capture on your Galaxy A53 are saved in the gallery app. To access your screenshots, simply open the gallery app and navigate to the “Screenshots” album or folder. From there, you can view, organize, and edit your screenshots with ease.
Basic Editing Tools
The Galaxy A53 provides basic editing tools within the gallery app, allowing you to enhance and customize your screenshots. These tools include cropping, rotating, adding text or stickers, and adjusting brightness, contrast, and saturation levels. Take advantage of these editing tools to make your screenshots more visually appealing and informative.
Sharing Screenshots on Social Media
Now that you have a perfectly edited screenshot, you can easily share it with others through various social media platforms. Simply select the desired screenshot, tap the share button, and choose your preferred social media app. The Galaxy A53 integrates seamlessly with popular platforms such as Facebook, Instagram, Twitter, and many others, making it effortless to share your screenshots with friends, family, or followers.
Troubleshooting Common Issues
While taking a screenshot on your Galaxy A53 is usually a straightforward process, there may be situations where you encounter issues. Let’s address some common problems and provide troubleshooting advice.
Screenshot Not Working
If you find that the screenshot function is not working on your Galaxy A53, double-check that the necessary settings and options mentioned earlier are correctly enabled. Additionally, ensure that your device software is up to date, as updates often include bug fixes and performance improvements. If the problem persists, consider restarting your device or reaching out to Samsung’s support team for further assistance.
Screenshot Quality Issues
In some cases, you may notice that the quality of your screenshots is not as expected, with blurriness or artifacts. This can be attributed to various factors, such as low lighting conditions, motion blur, or display settings. To improve the quality, ensure that you capture screenshots in well-lit environments, hold your device steady while taking the screenshot, and adjust relevant display settings if necessary. Experimenting with these factors should help you achieve clear and crisp screenshots.
Storage and Accessibility Concerns
If you’re experiencing storage issues due to a large number of screenshots, it’s advisable to periodically transfer them to a computer or external storage device. This frees up space on your Galaxy A53 and ensures that you can continue capturing screenshots effortlessly. Additionally, individuals with accessibility concerns can explore accessibility settings available on the Galaxy A53, such as enabling voice commands or using alternative input methods for taking screenshots.
By following the steps provided in this guide, you can now confidently take screenshots on your Galaxy A53 and make the most of this handy feature. Whether you’re capturing important information or sharing delightful moments, screenshots offer a versatile tool for enhancing your smartphone experience. Remember to stay updated with the latest software updates and explore additional features available on your Galaxy A53 for a truly personalized experience. Happy screenshotting!
Enhance Your Screenshots with GIFCaster
Ready to take your Galaxy A53 screenshot game to the next level? With GIFCaster, you can easily add a touch of personality and fun to your captures. Transform a simple screen grab into an engaging, animated experience by incorporating GIFs that express your creativity and mood. Whether it’s celebrating a milestone with a burst of confetti or adding a humorous twist to a conversation, GIFCaster makes it all possible. Don’t just share a screenshot—make it memorable with GIFCaster. Use the GIFCaster App today and start turning your everyday moments into something extraordinary!